1. Introduction
This codelab will lay the groundwork for a Solace based Event Mesh by setting up a Dynamic Message Routing (DMR) link between two stand alone brokers. These brokers can be running in Docker or on Solace Cloud, in any cloud environment. Then we will explore how events are propagated across a DMR link. Setup publishers and Subscribers to each of the brokers in our Event Mesh in order to see events publish to one broker be dynamically routed to the other brokers in our Event Mesh where there are active subscribers.
Learning Objectives:
⬜️ Setup a DMR link between two Solace Brokers
⬜️ Publish and Subscribe to DMR enabled topics with Try Me
⬜️ Publish and Subscribe to DMR enabled topics with SDKPerf
Resulting Architecture:
2. Prerequisites
Prerequisites
- 2+ Solace PubSub+ Brokers deployed in environments where they are visable to each other over a network.
- Access to the Solace Broker WebUI for all Brokers via administrator credentials.
If you do not meet both of these requirements please use the following resources to setup and configure Solace PubSub+ Brokers.
3. Setting up DMR with the Solace Broker WebUI
What is a Solace Event Mesh Powered by DMR
If you have not heard about Solace Dynamic Message Routing (DMR) or Event Mesh here is a quick refresher: An event mesh is like a super-efficient highway system for data that allows event data to flow only to parts of the mesh where that event is needed. This occurs dynamically, meaning that new event types can be added any time, and new interests in events can also be registered, immediately changing the flow of events in real time. Event Brokers that make up the mesh can be running in any environment (data center, private cloud, public cloud, or combination), and are configured to dynamically route data from producing applications to consuming applications without forcing those applications to know about one another, or how they connect to the mesh.
Connecting Solace Brokers via DMR
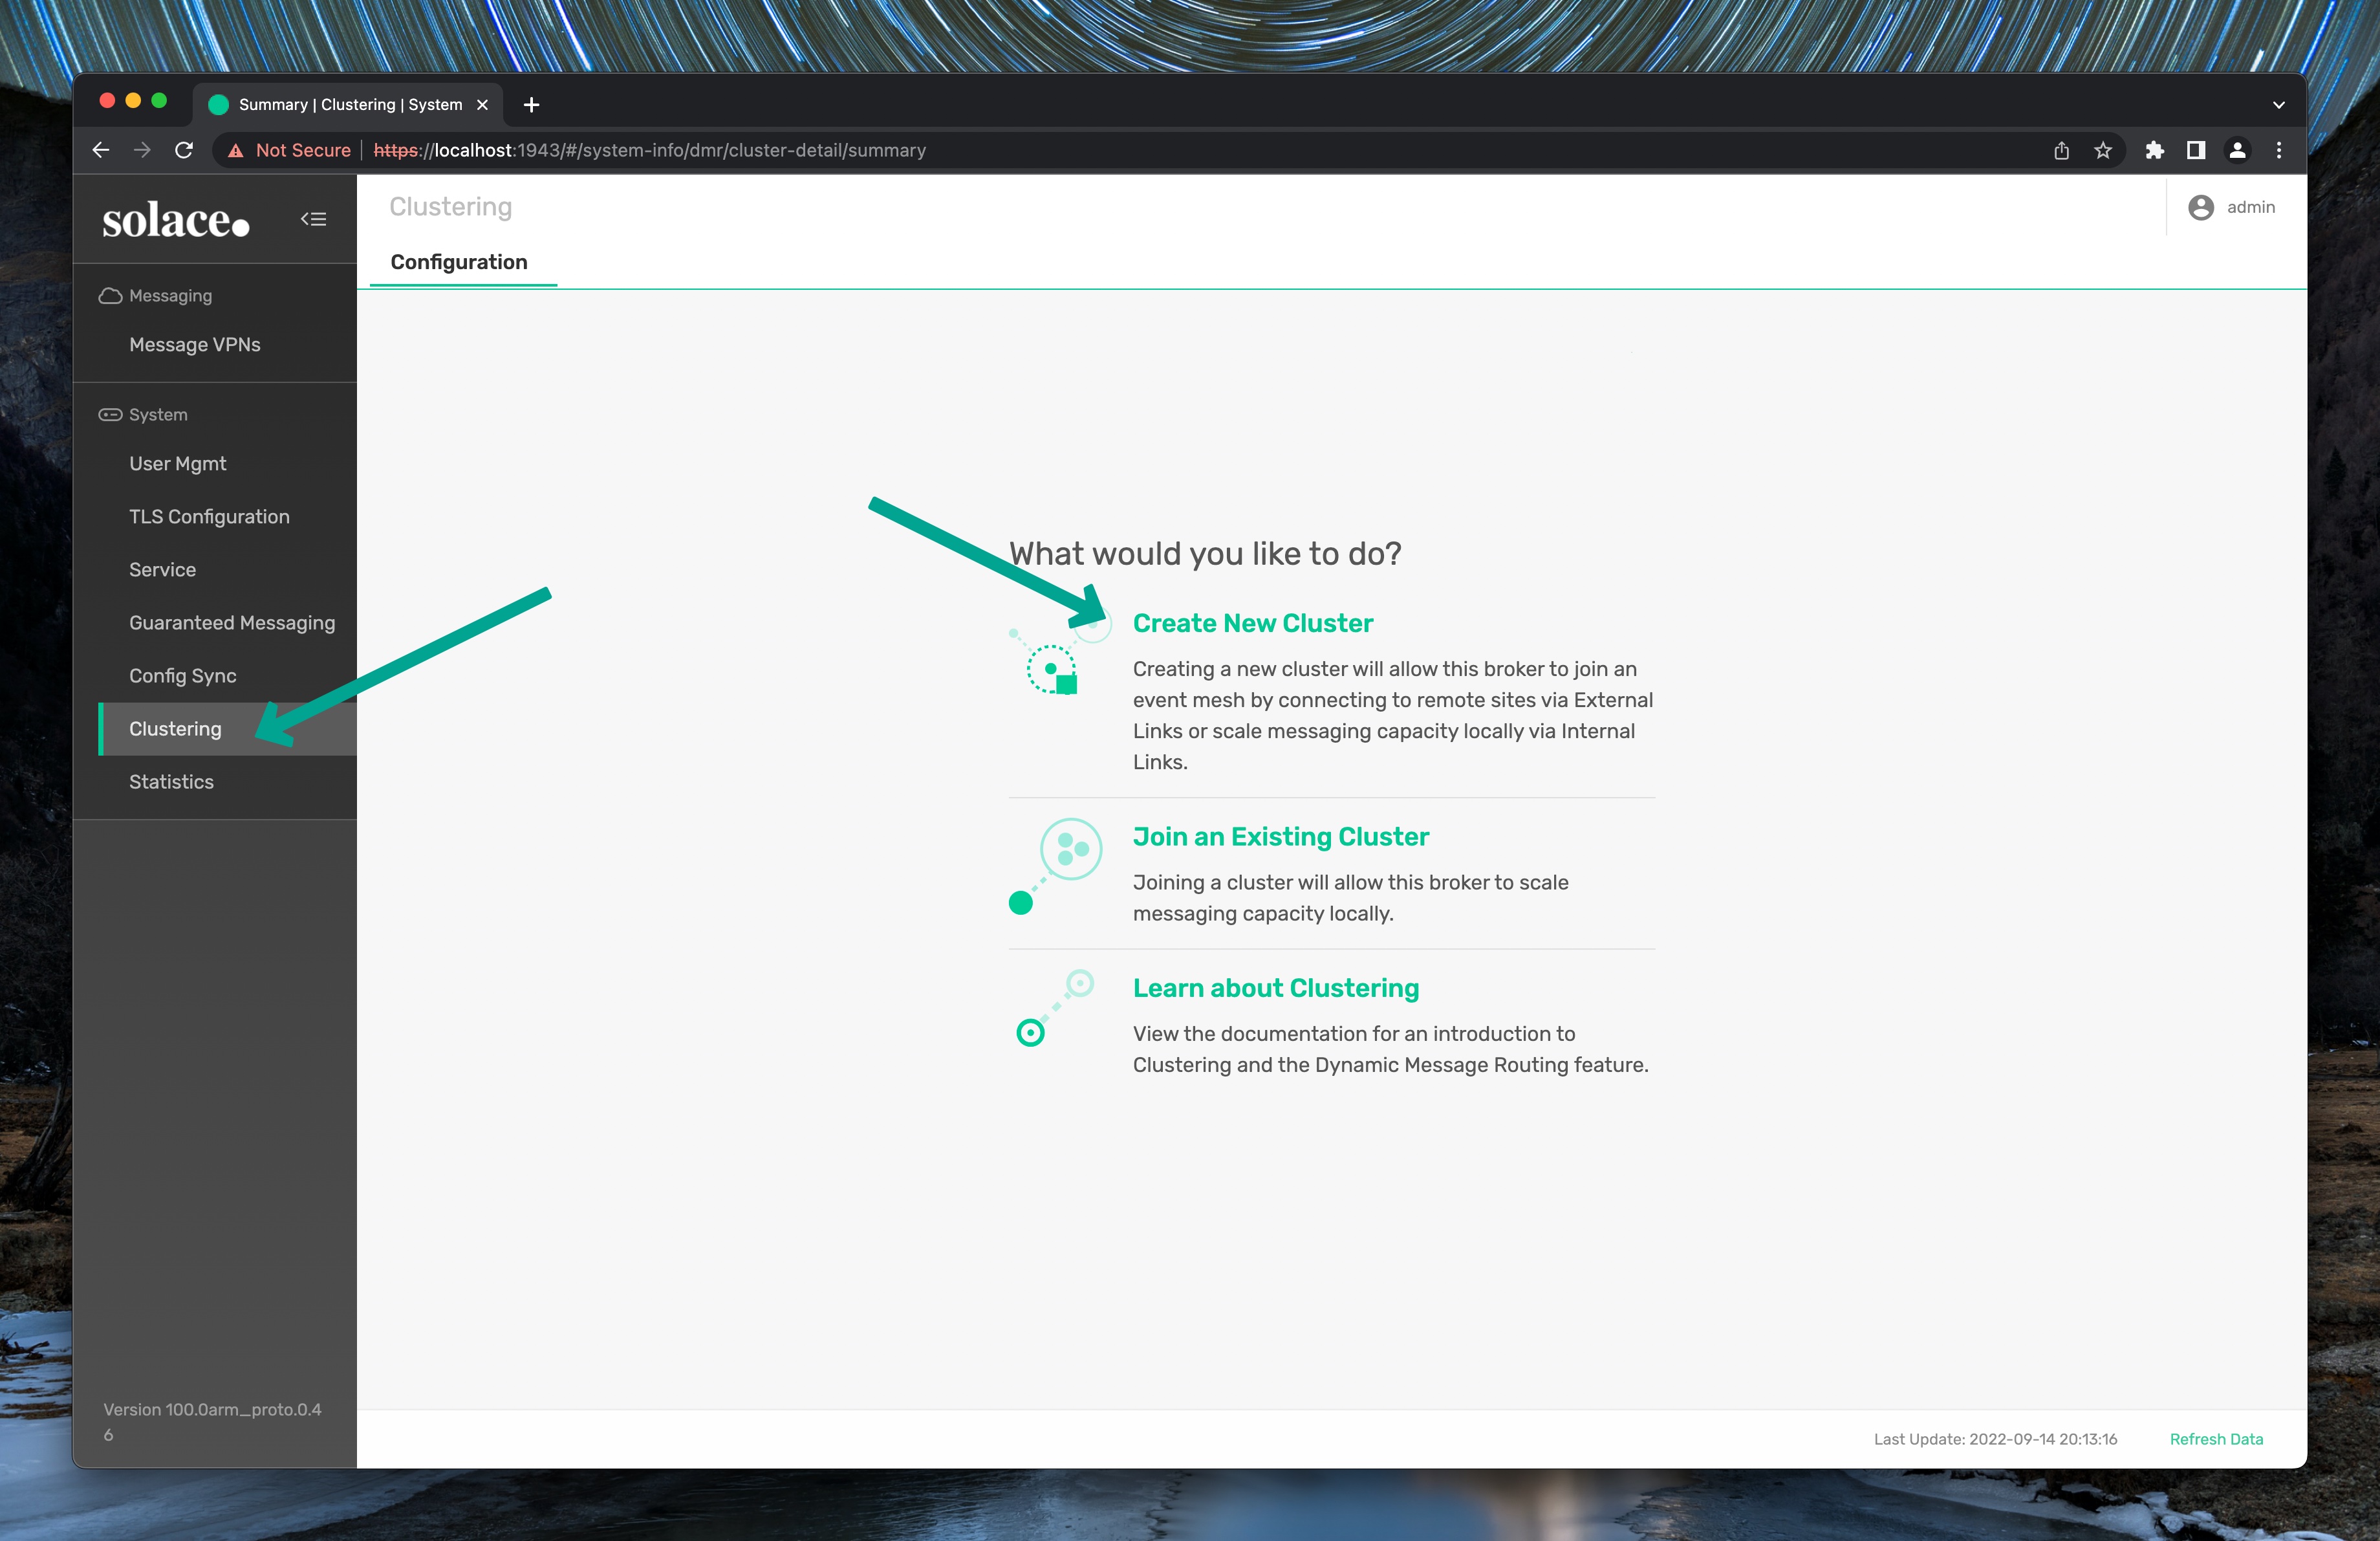
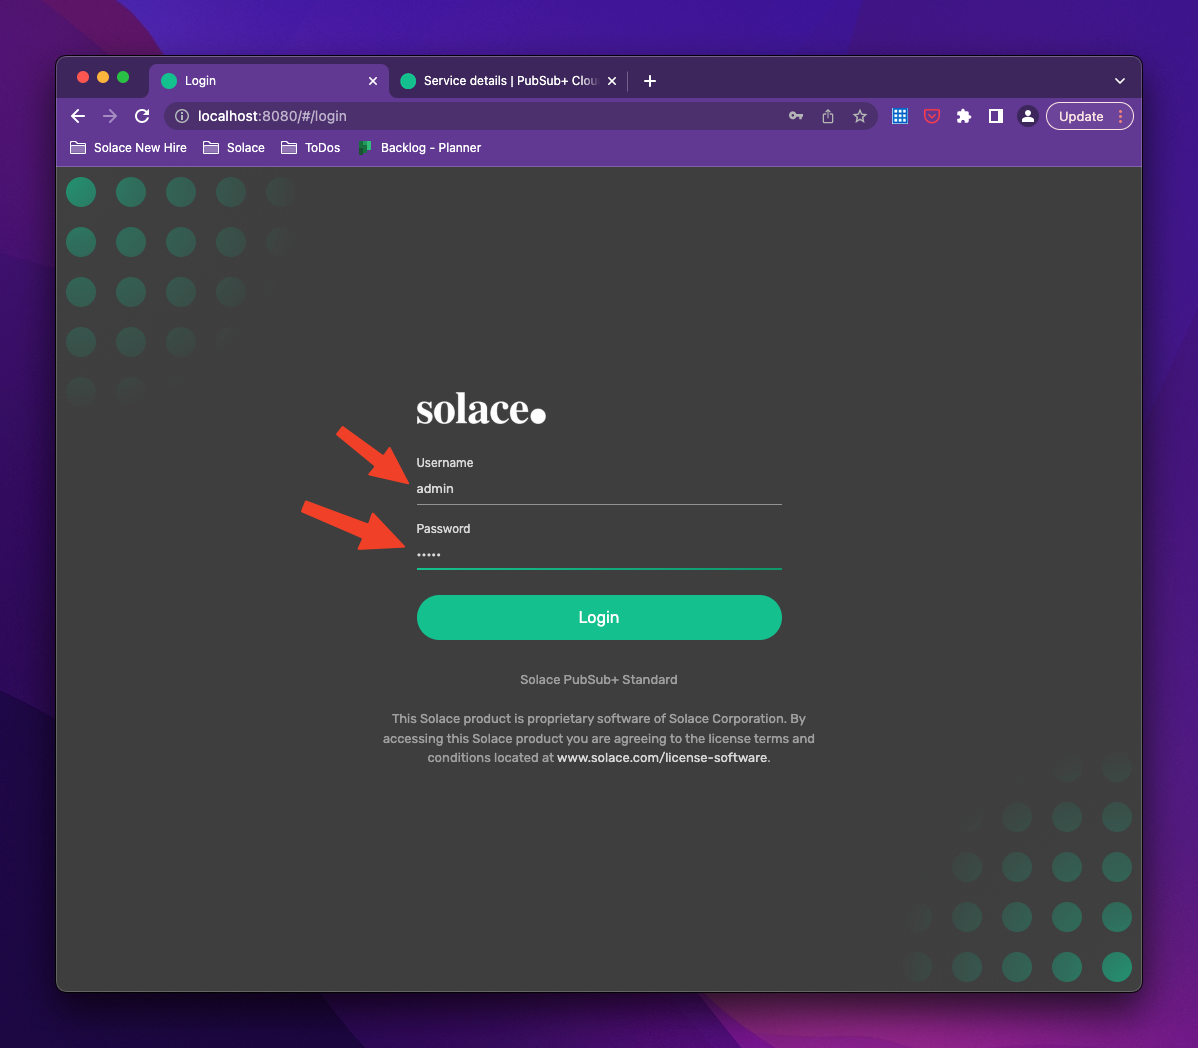
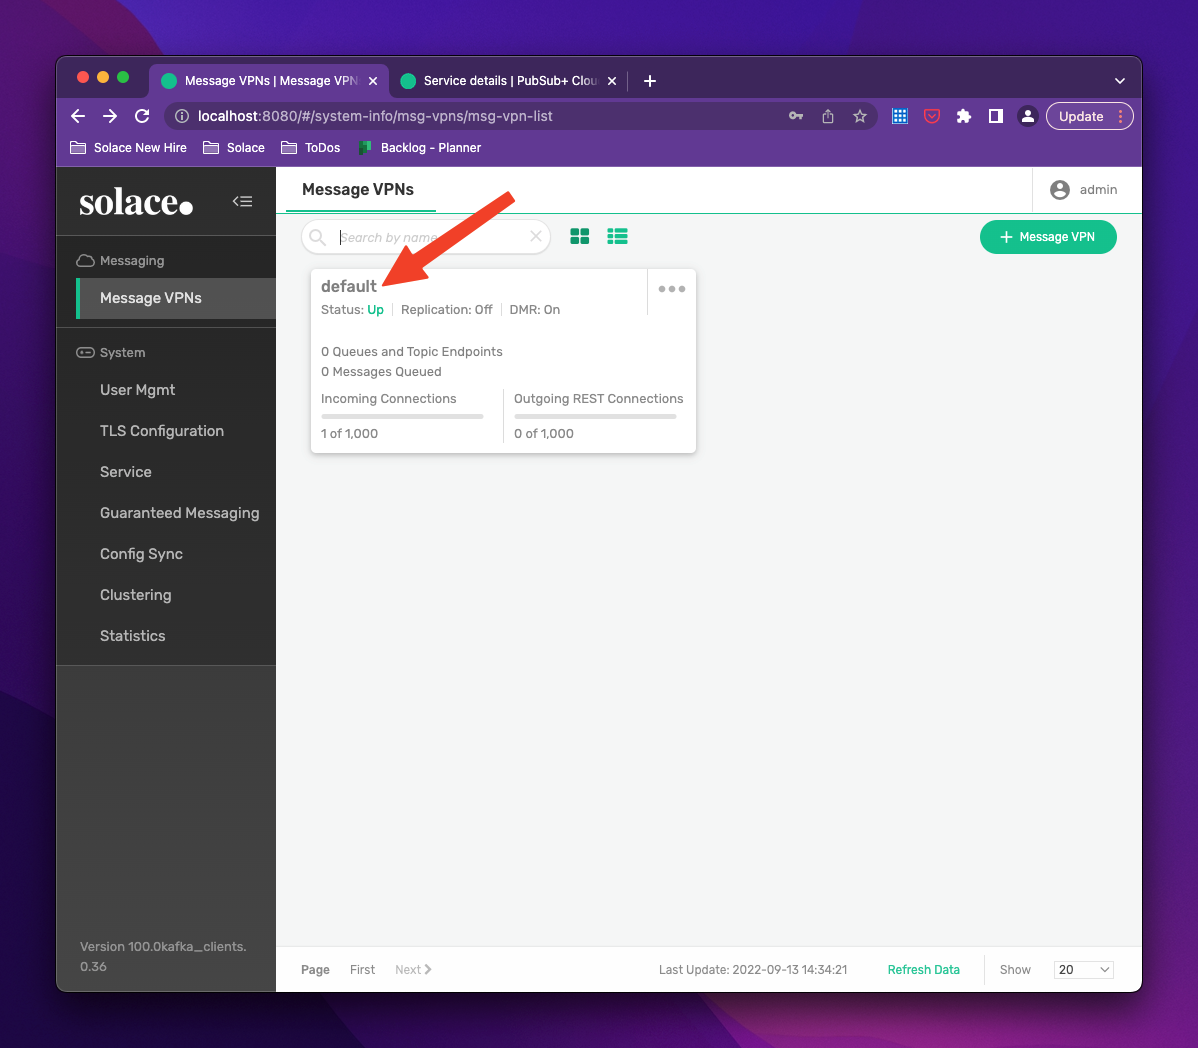
- Navigate to the Broker WebUI and Login
- Create a new Cluster:
Select Cluster from the left Solace menu then select Create New Cluster
- Define cluster: Set Name, provide cluster password, confirm cluster password, turn off client certificate authentication, continue.
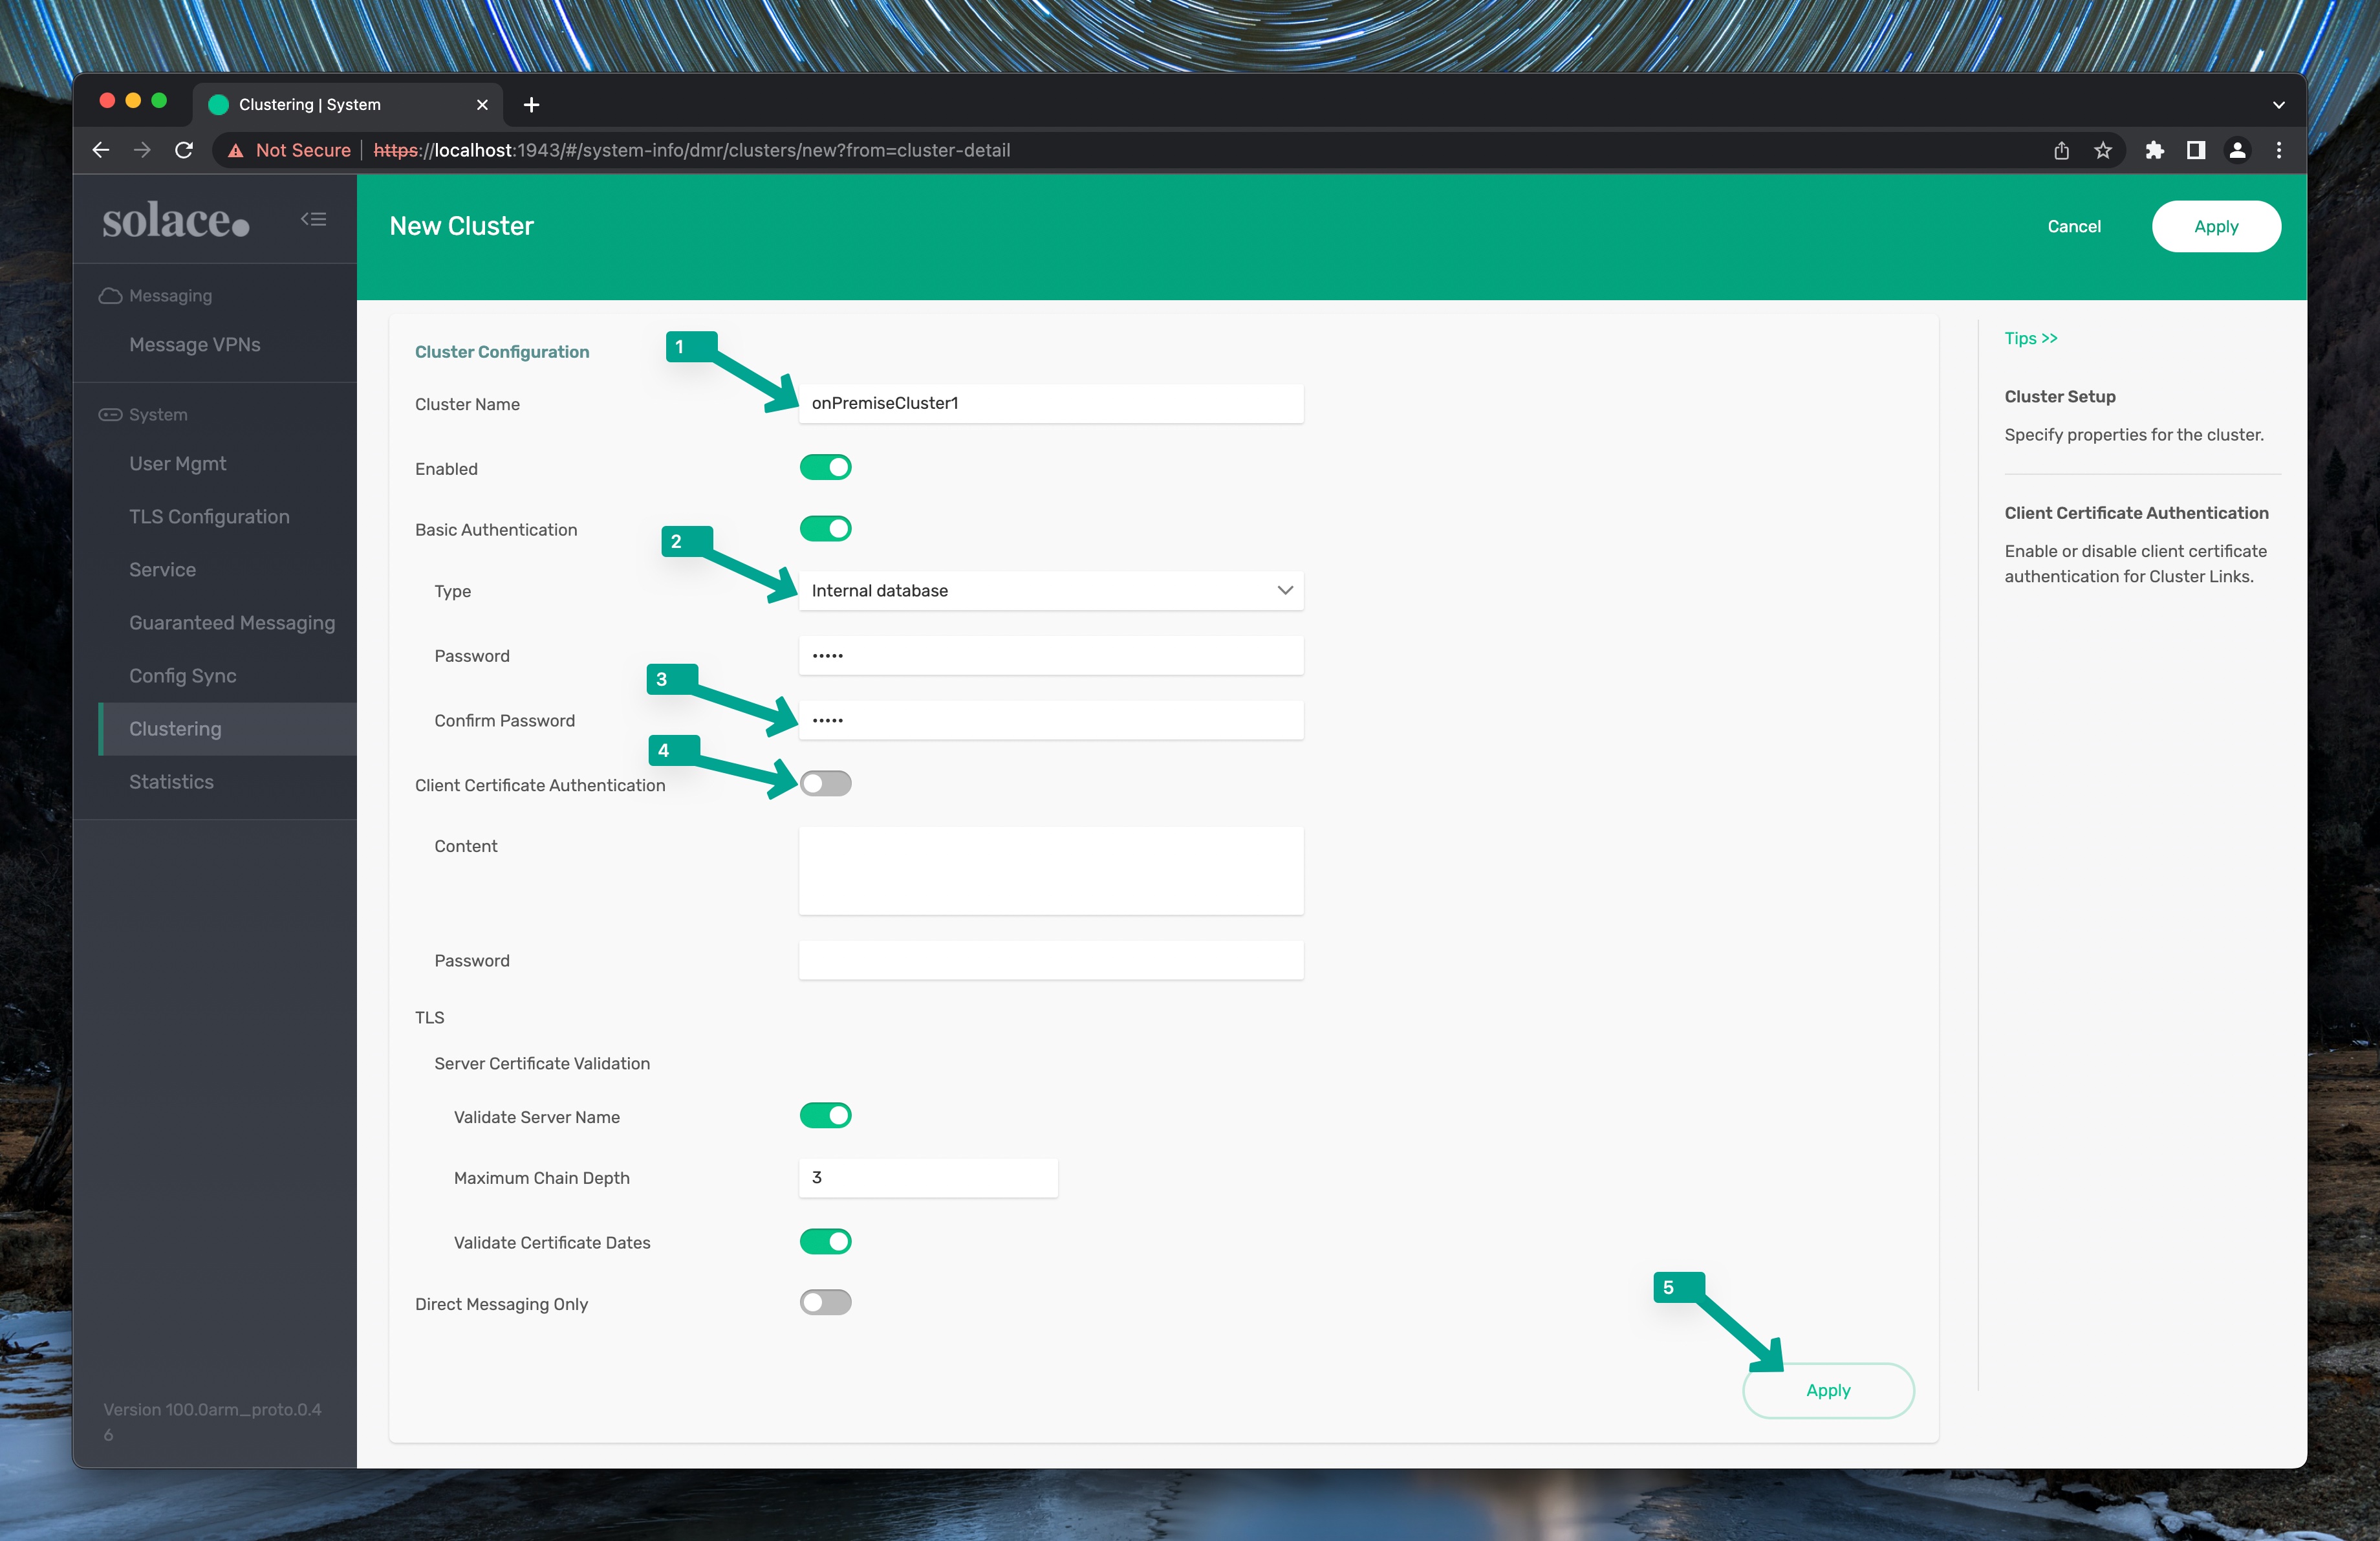
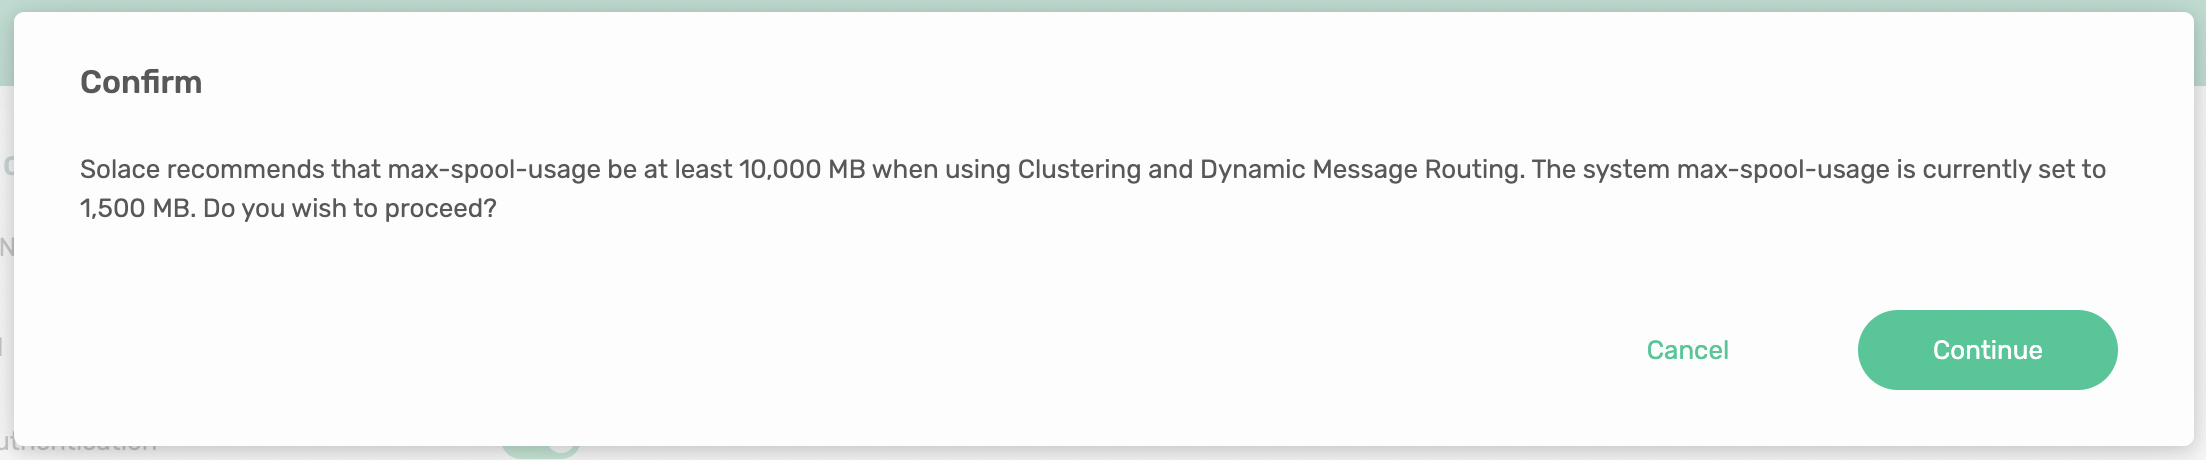
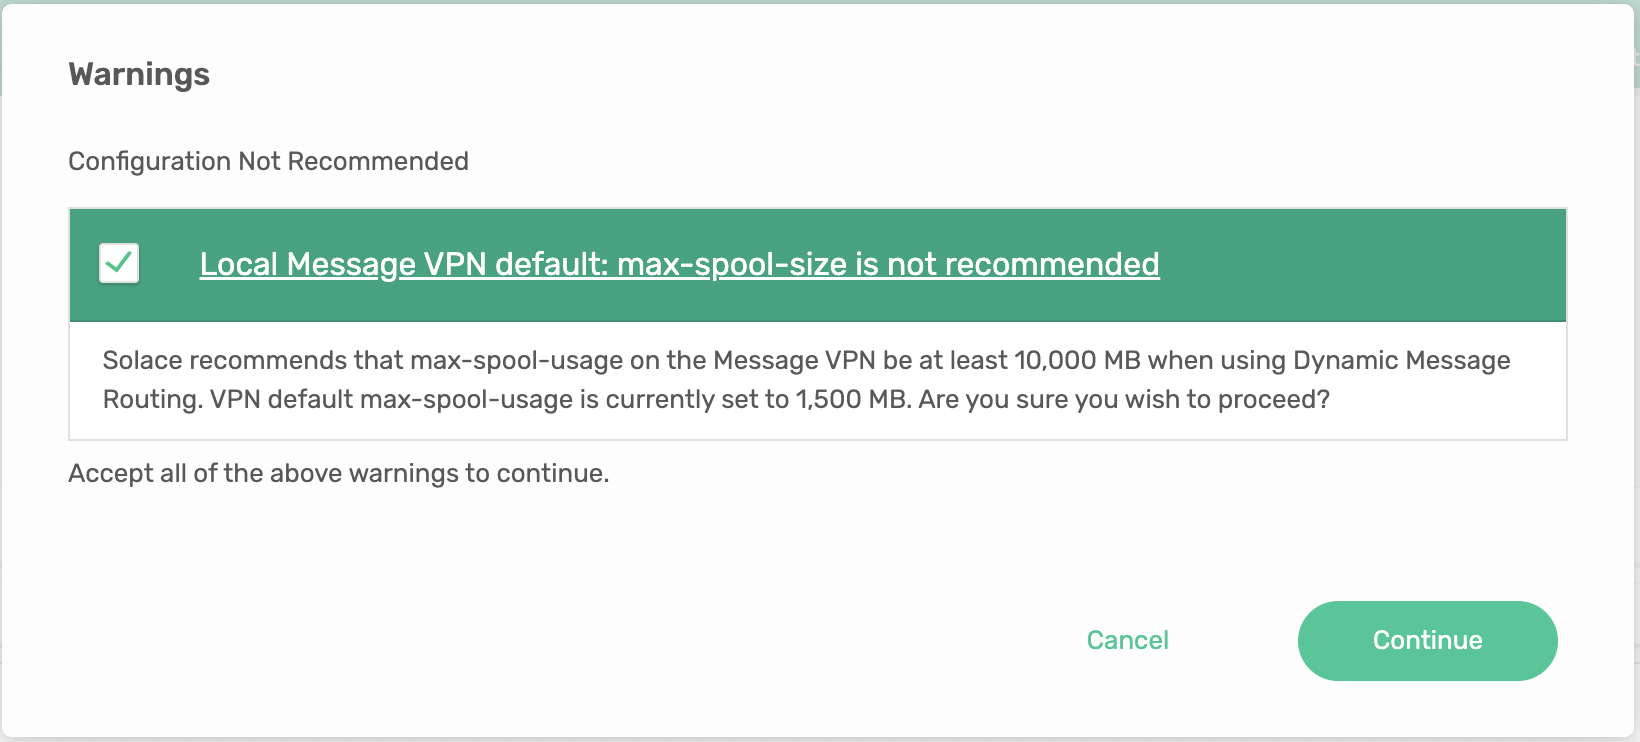
- If you are defining a cluster on the PubSub+ Standard Docker container you will likely get a warning about the spool side being too small. You can bypass the warning with no reprocussions, unless you are moving large amounts of data between brokers.
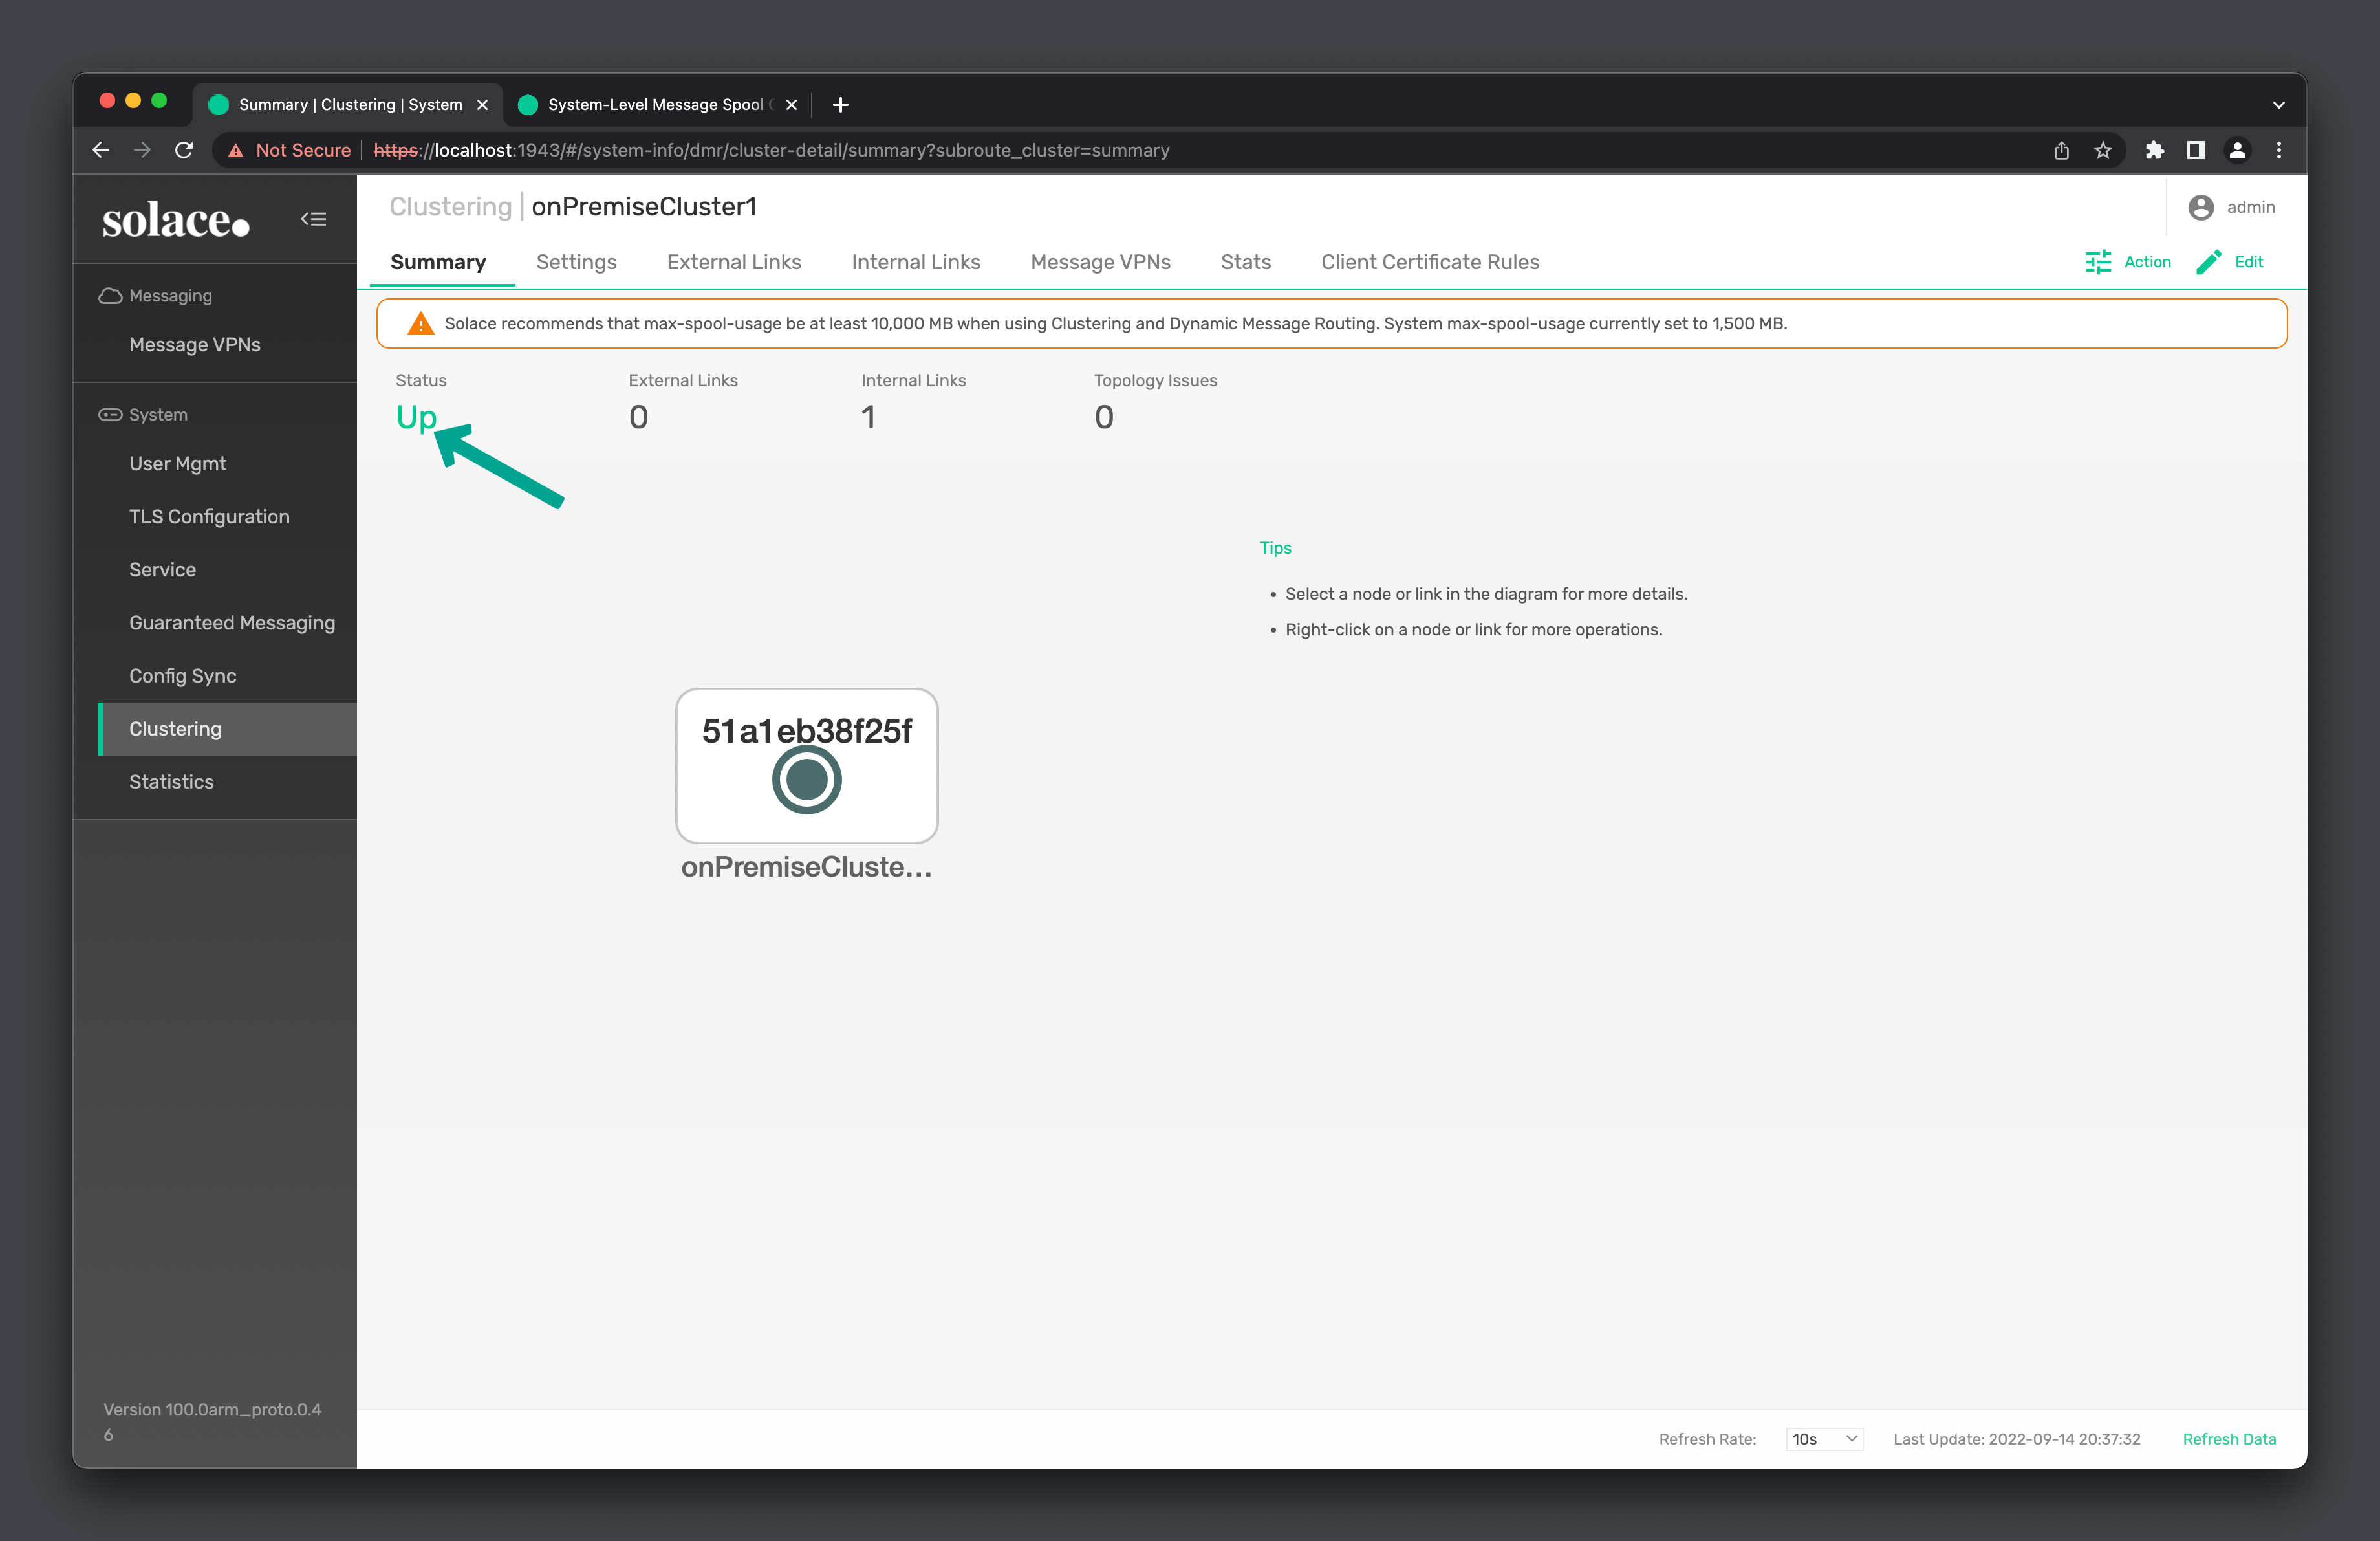
- After a few seconds you will see your new cluster status change to Up
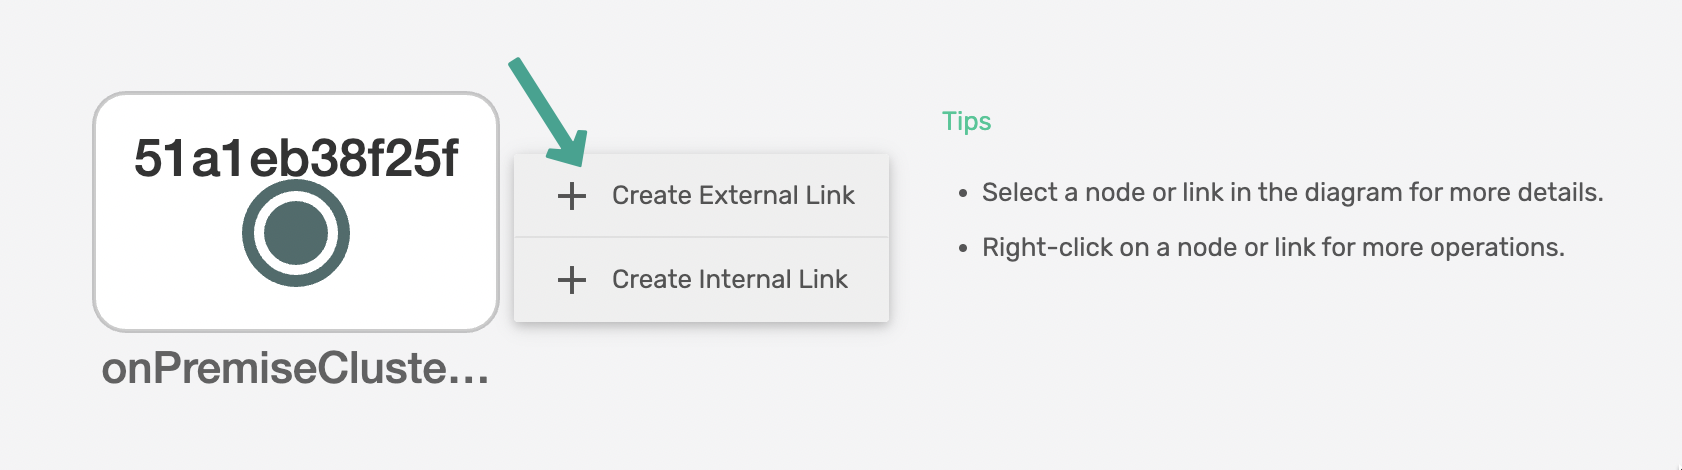
- Create an External DMR link between clusters: Right Click on the Cluster Summary page and Select "Create External Link"
 Or Switch from the "Summary" tab to the "External Links" tab and press "+ Click to Connect"
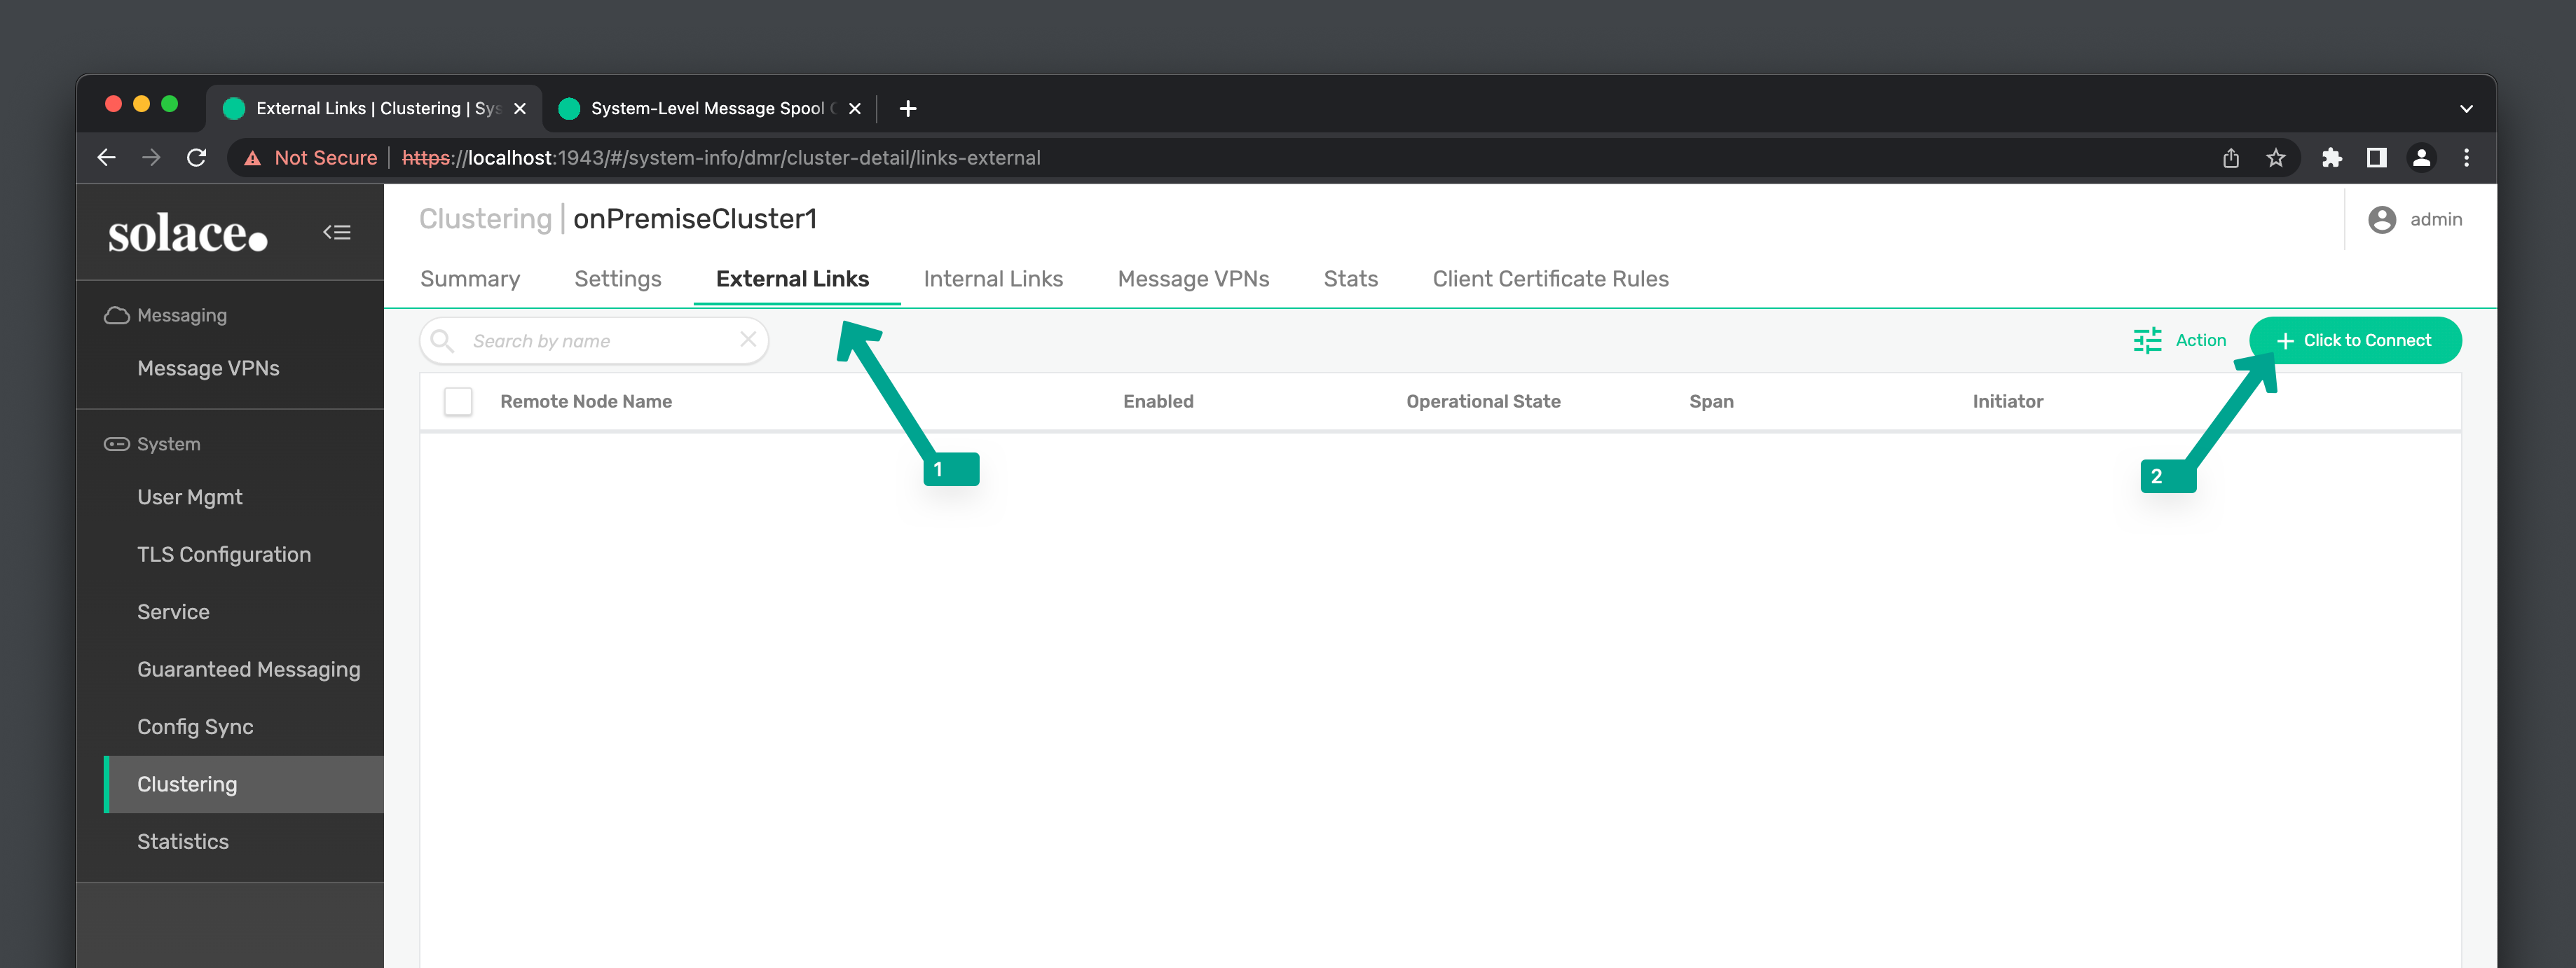
- Select the Remote Broker you would like to link to: Provide broker URL, Admin Username and Admin Password (Note: This is not your cluster password but instead a broker Admin username and password).
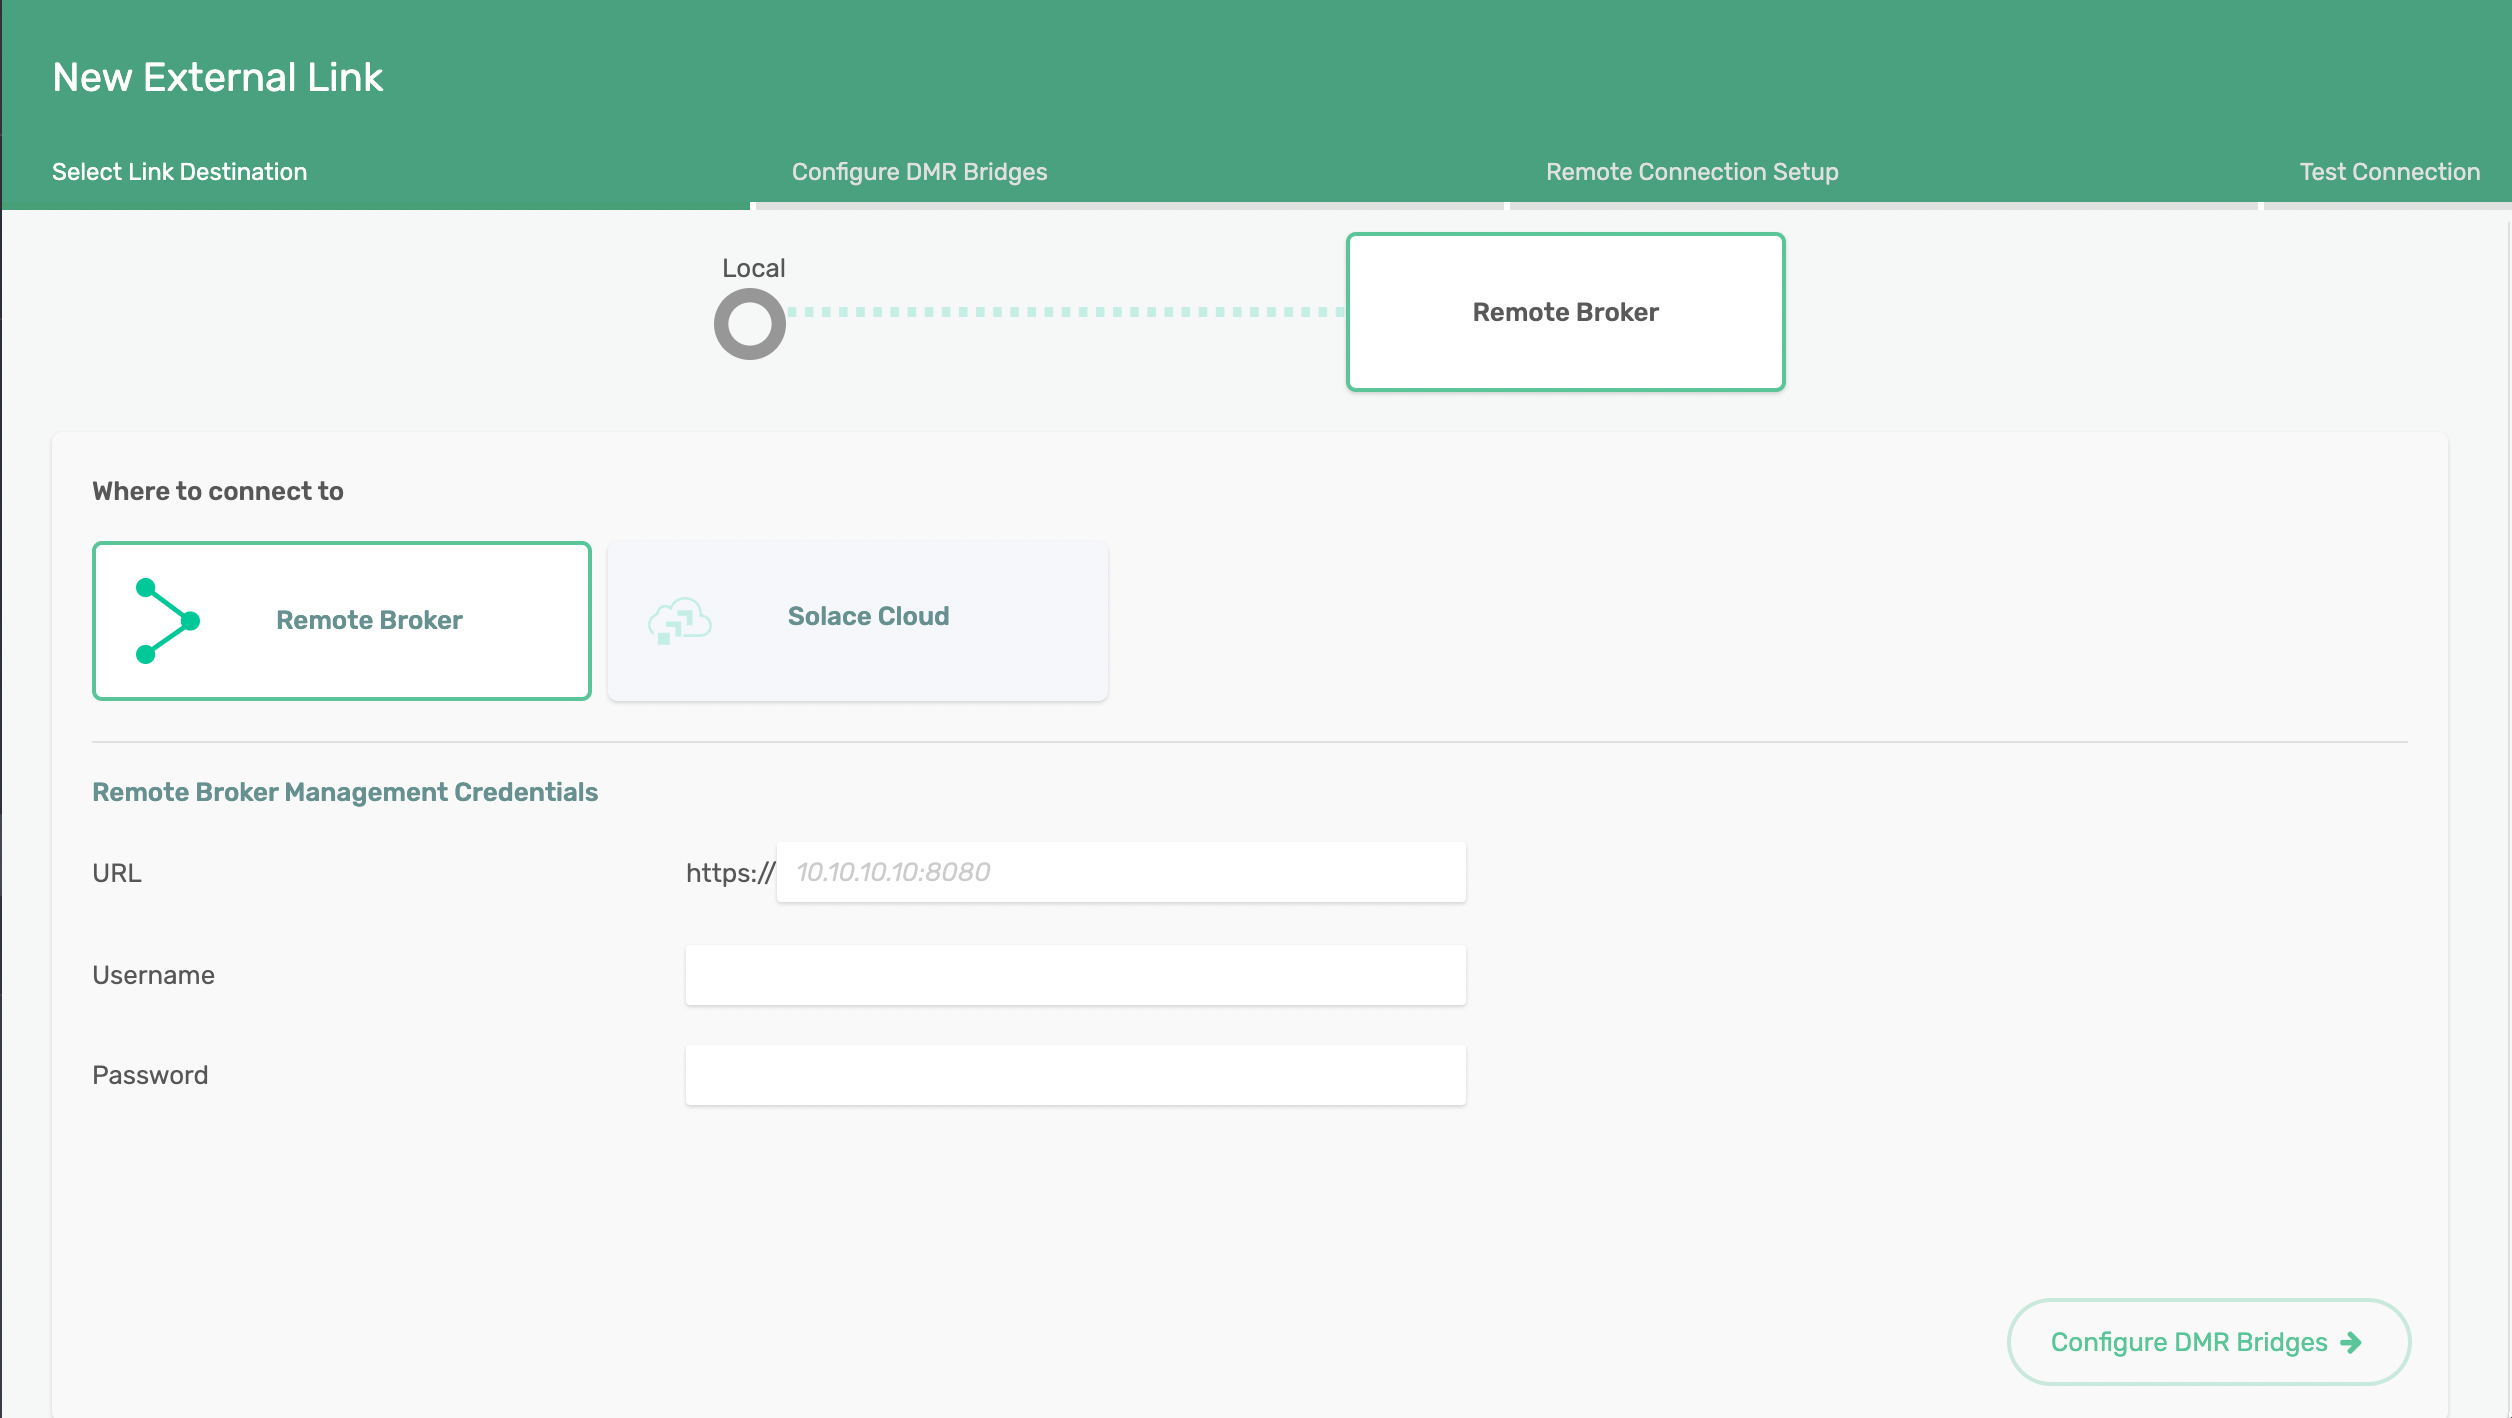 Or Login with Solace Cloud by providing your Solace cloud Username and Password. You can also connect with a Solace Cloud Token
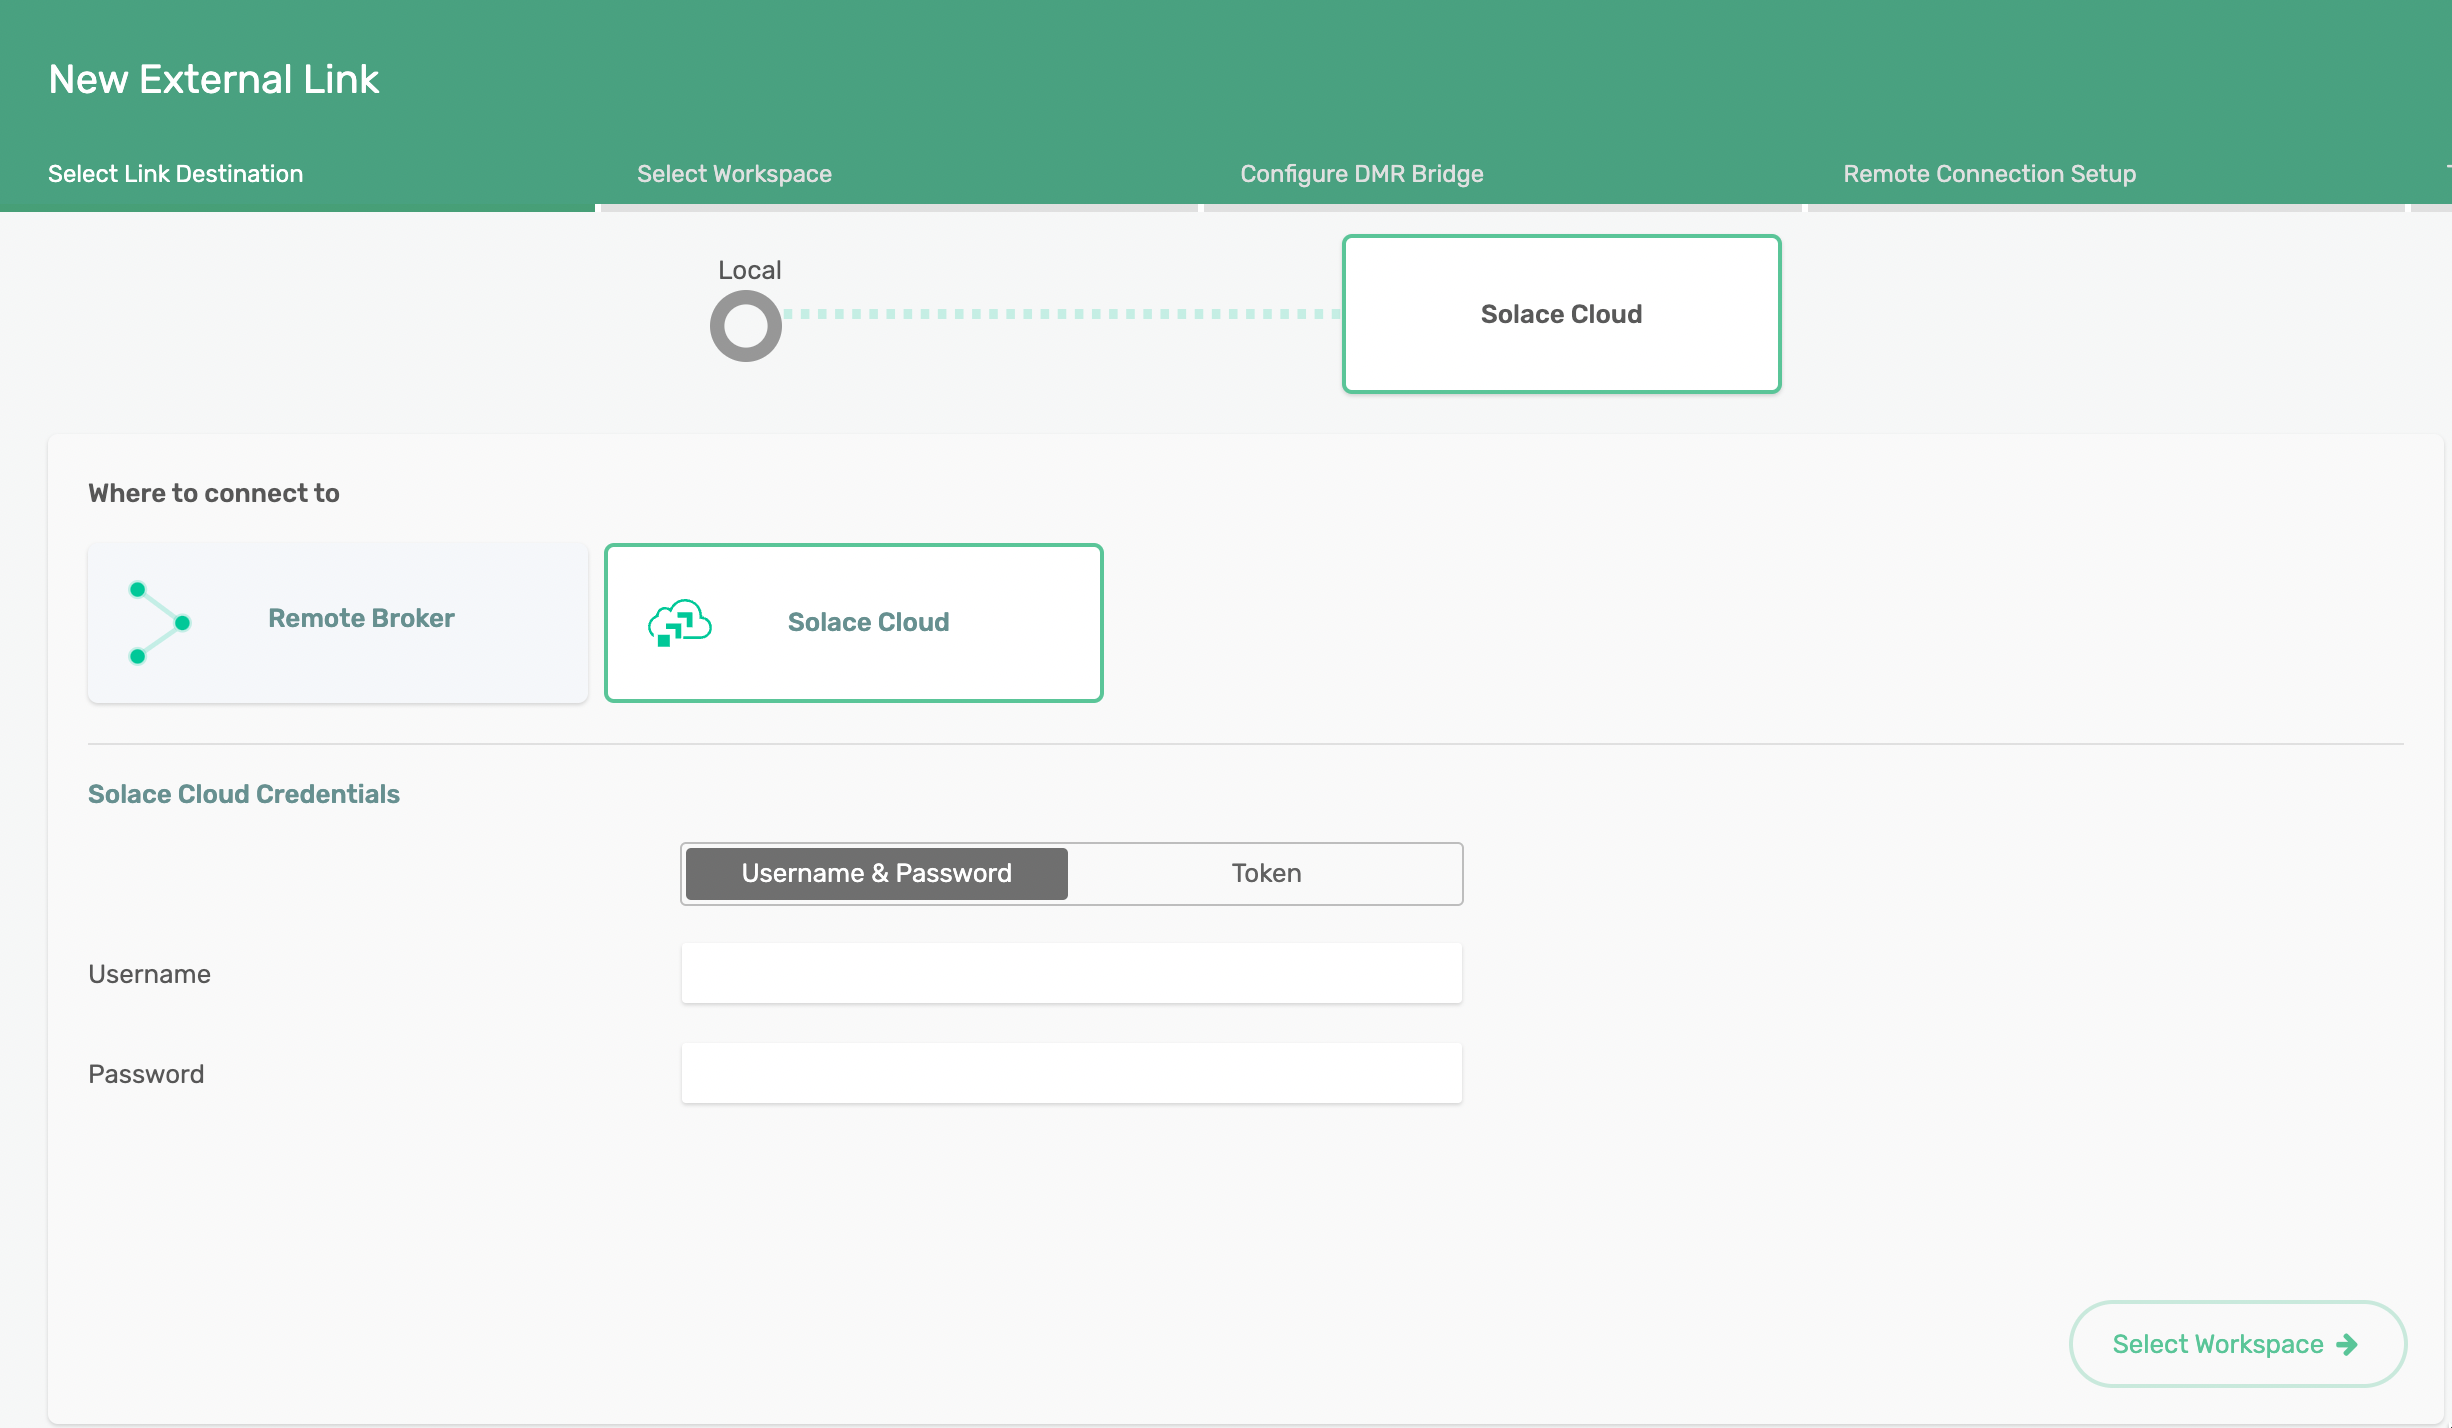
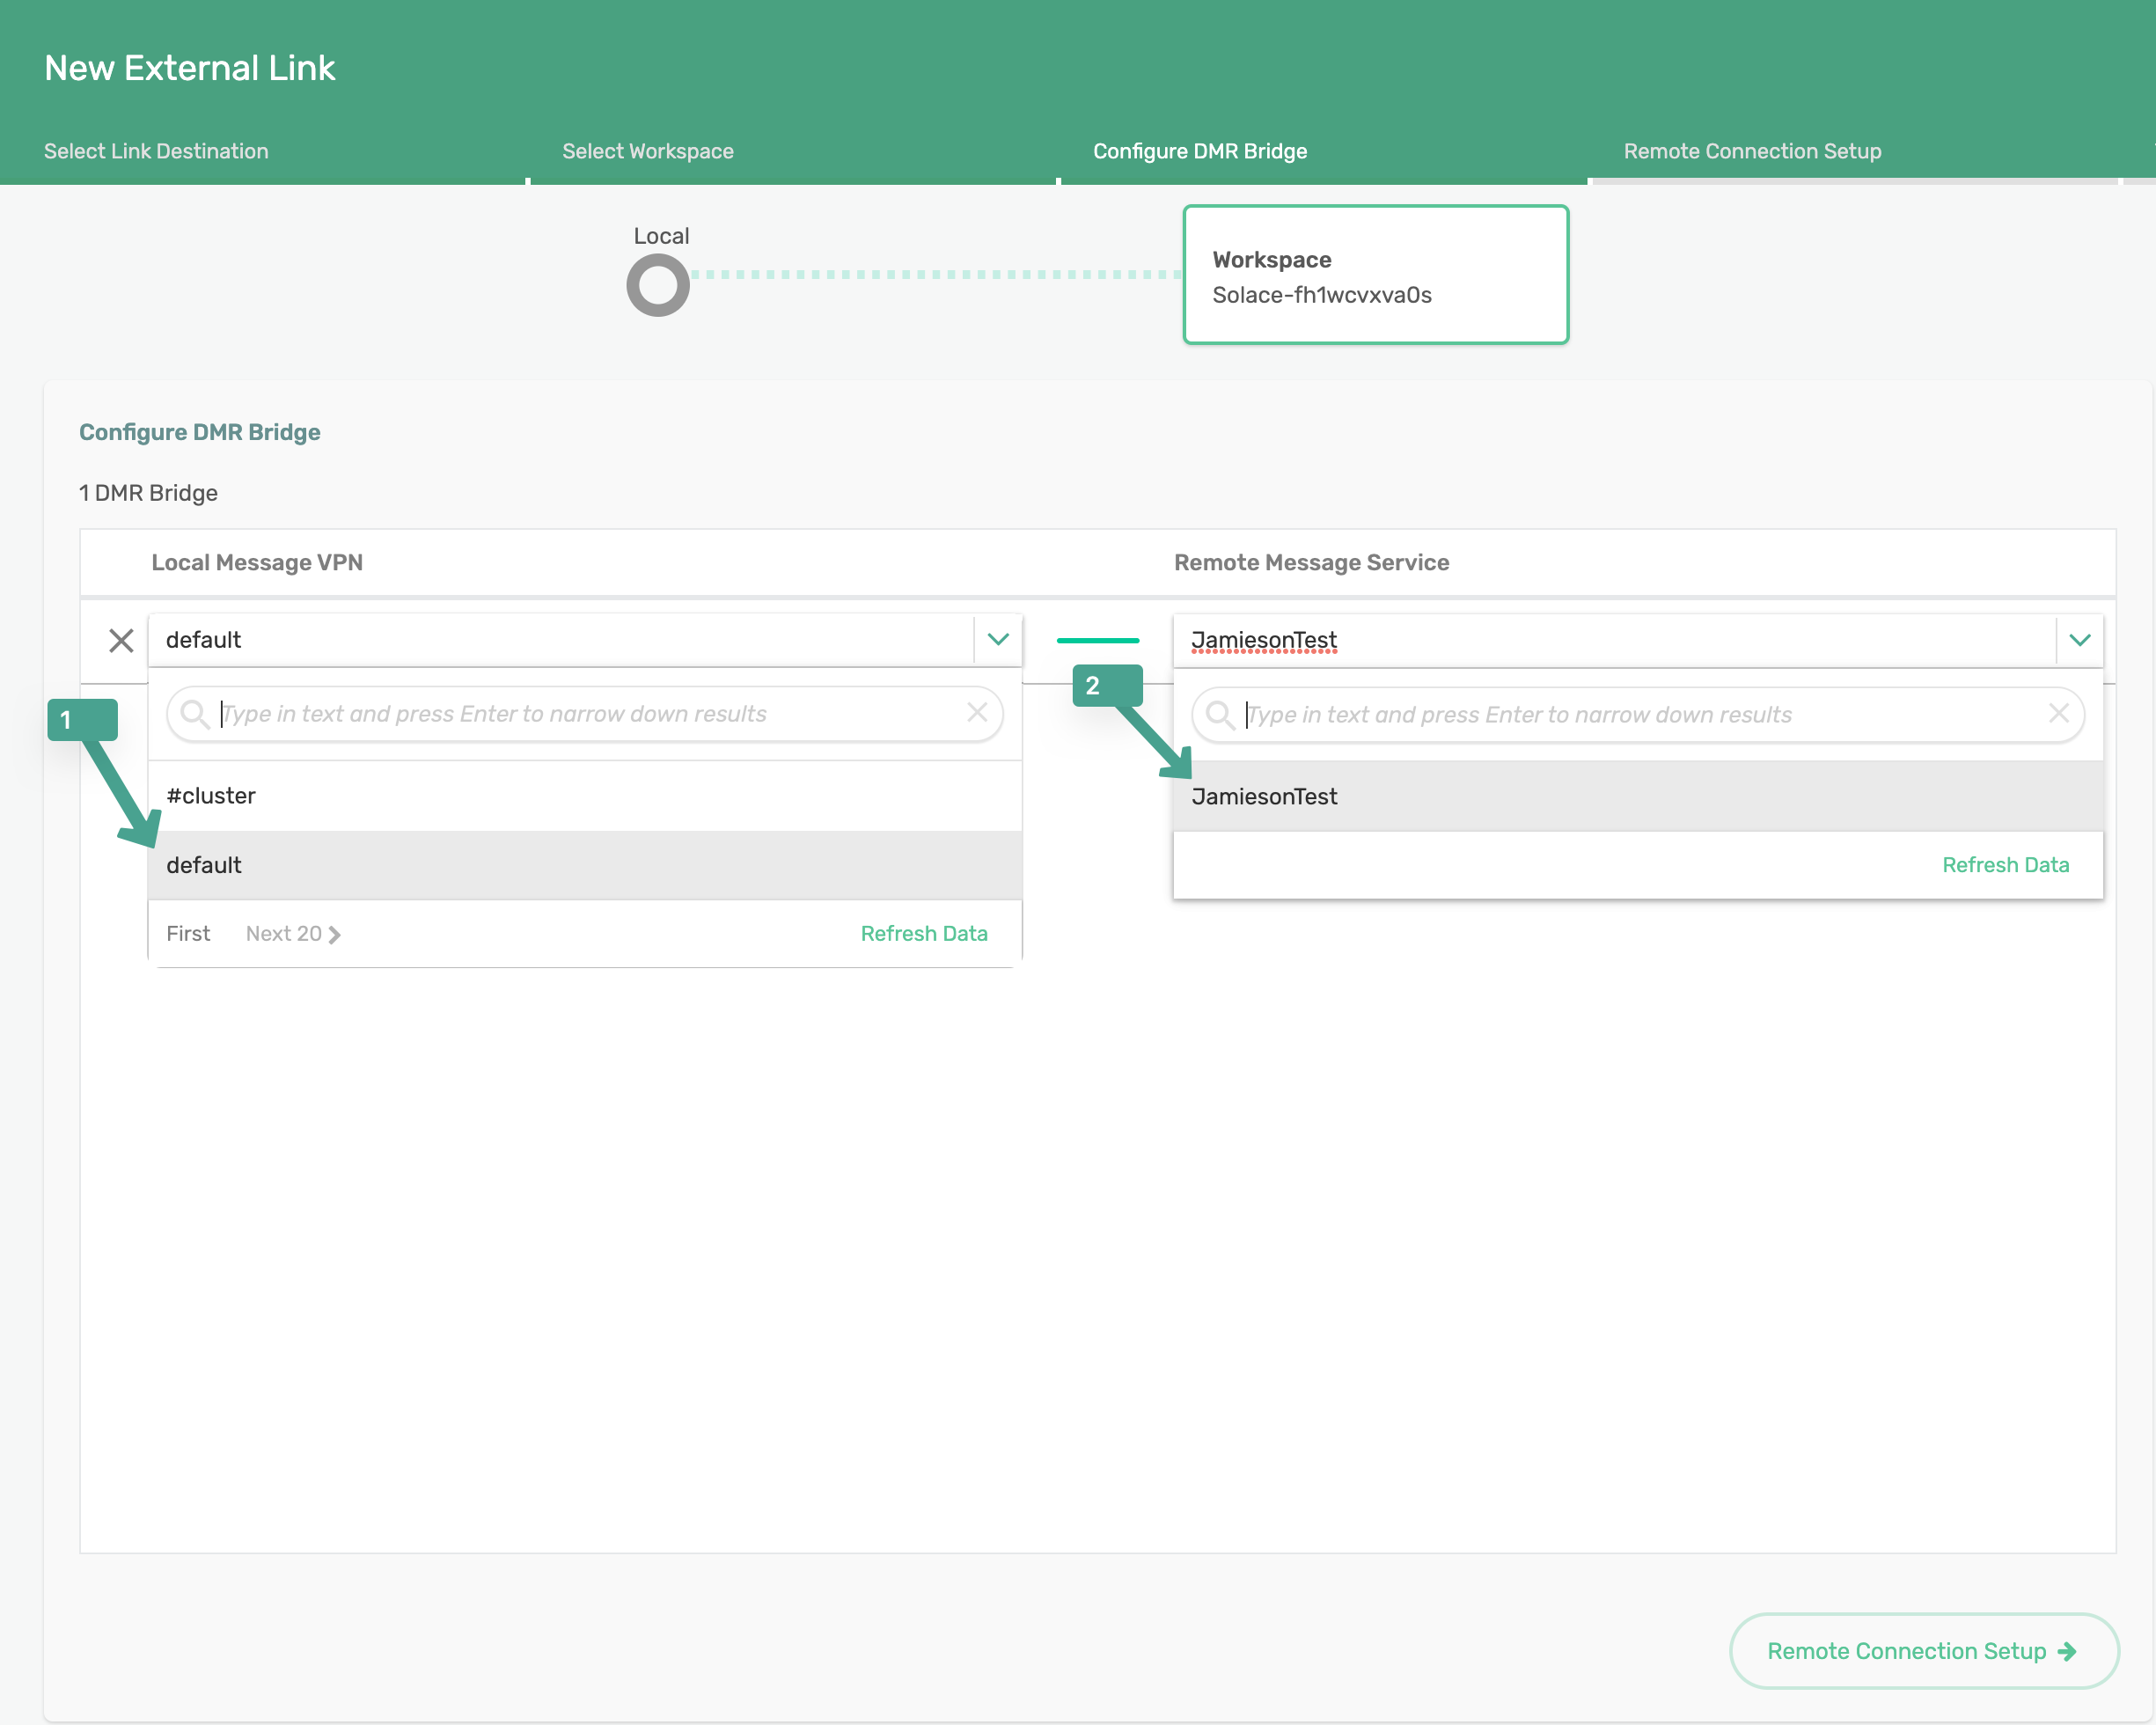
- Select Message VPNs to bridge: From the left side drop down menu select the desired Local Message VPN you wish to bridge. From the right side drop down menu select the desired Remote Message Service you would like to bridge.
- Bypass Spool Size Warning (again): If you are using a Docker Solace Software Broker and you did not alter your spool size earlier you will have to bypass another spool size warning
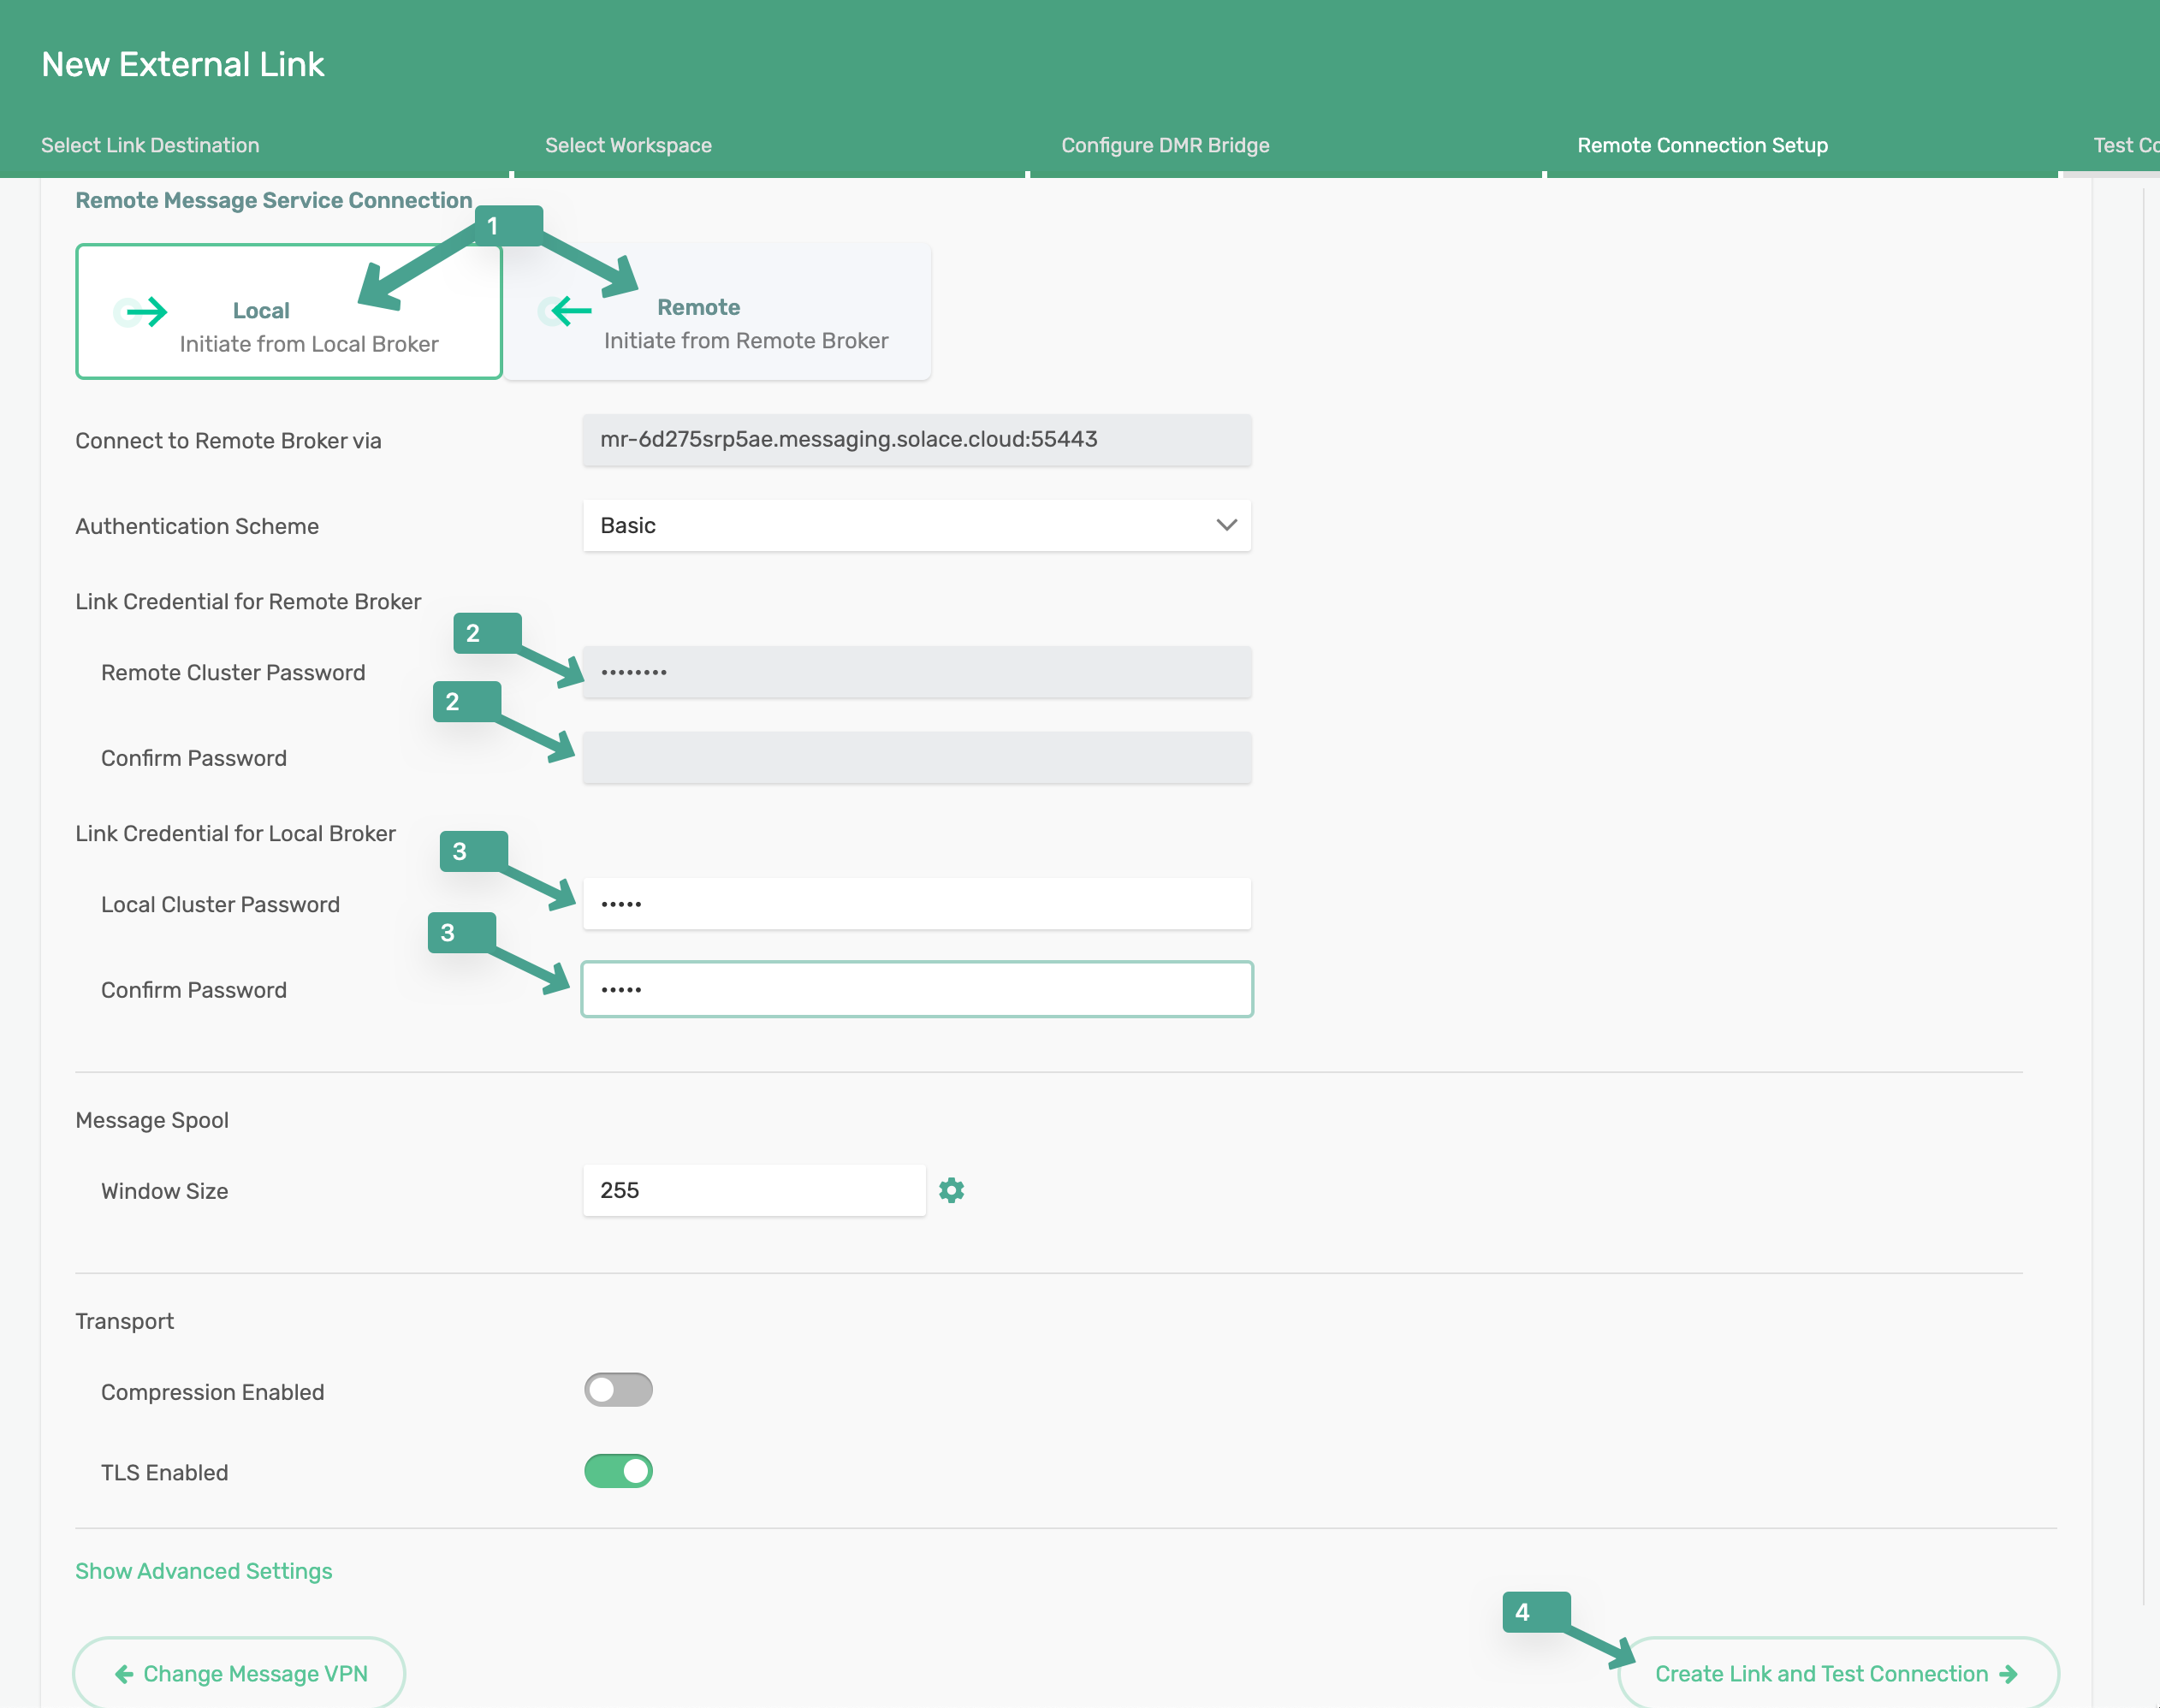
- Configure connection parameters: Select if you would like the local broker or the remote broker to initiate the DMR link, you would select once side vs the other if there were inbound firewall rules between brokers. For example if the local broker was hosted in a company internet and the remote broker was hosted on the Solace Cloud. Also provide the Remote Cluster Password and Local Cluster Password. These passwords were set in step 3 when you defined cluster parameters for each broker. Finally click "Create Link and Test Connection"
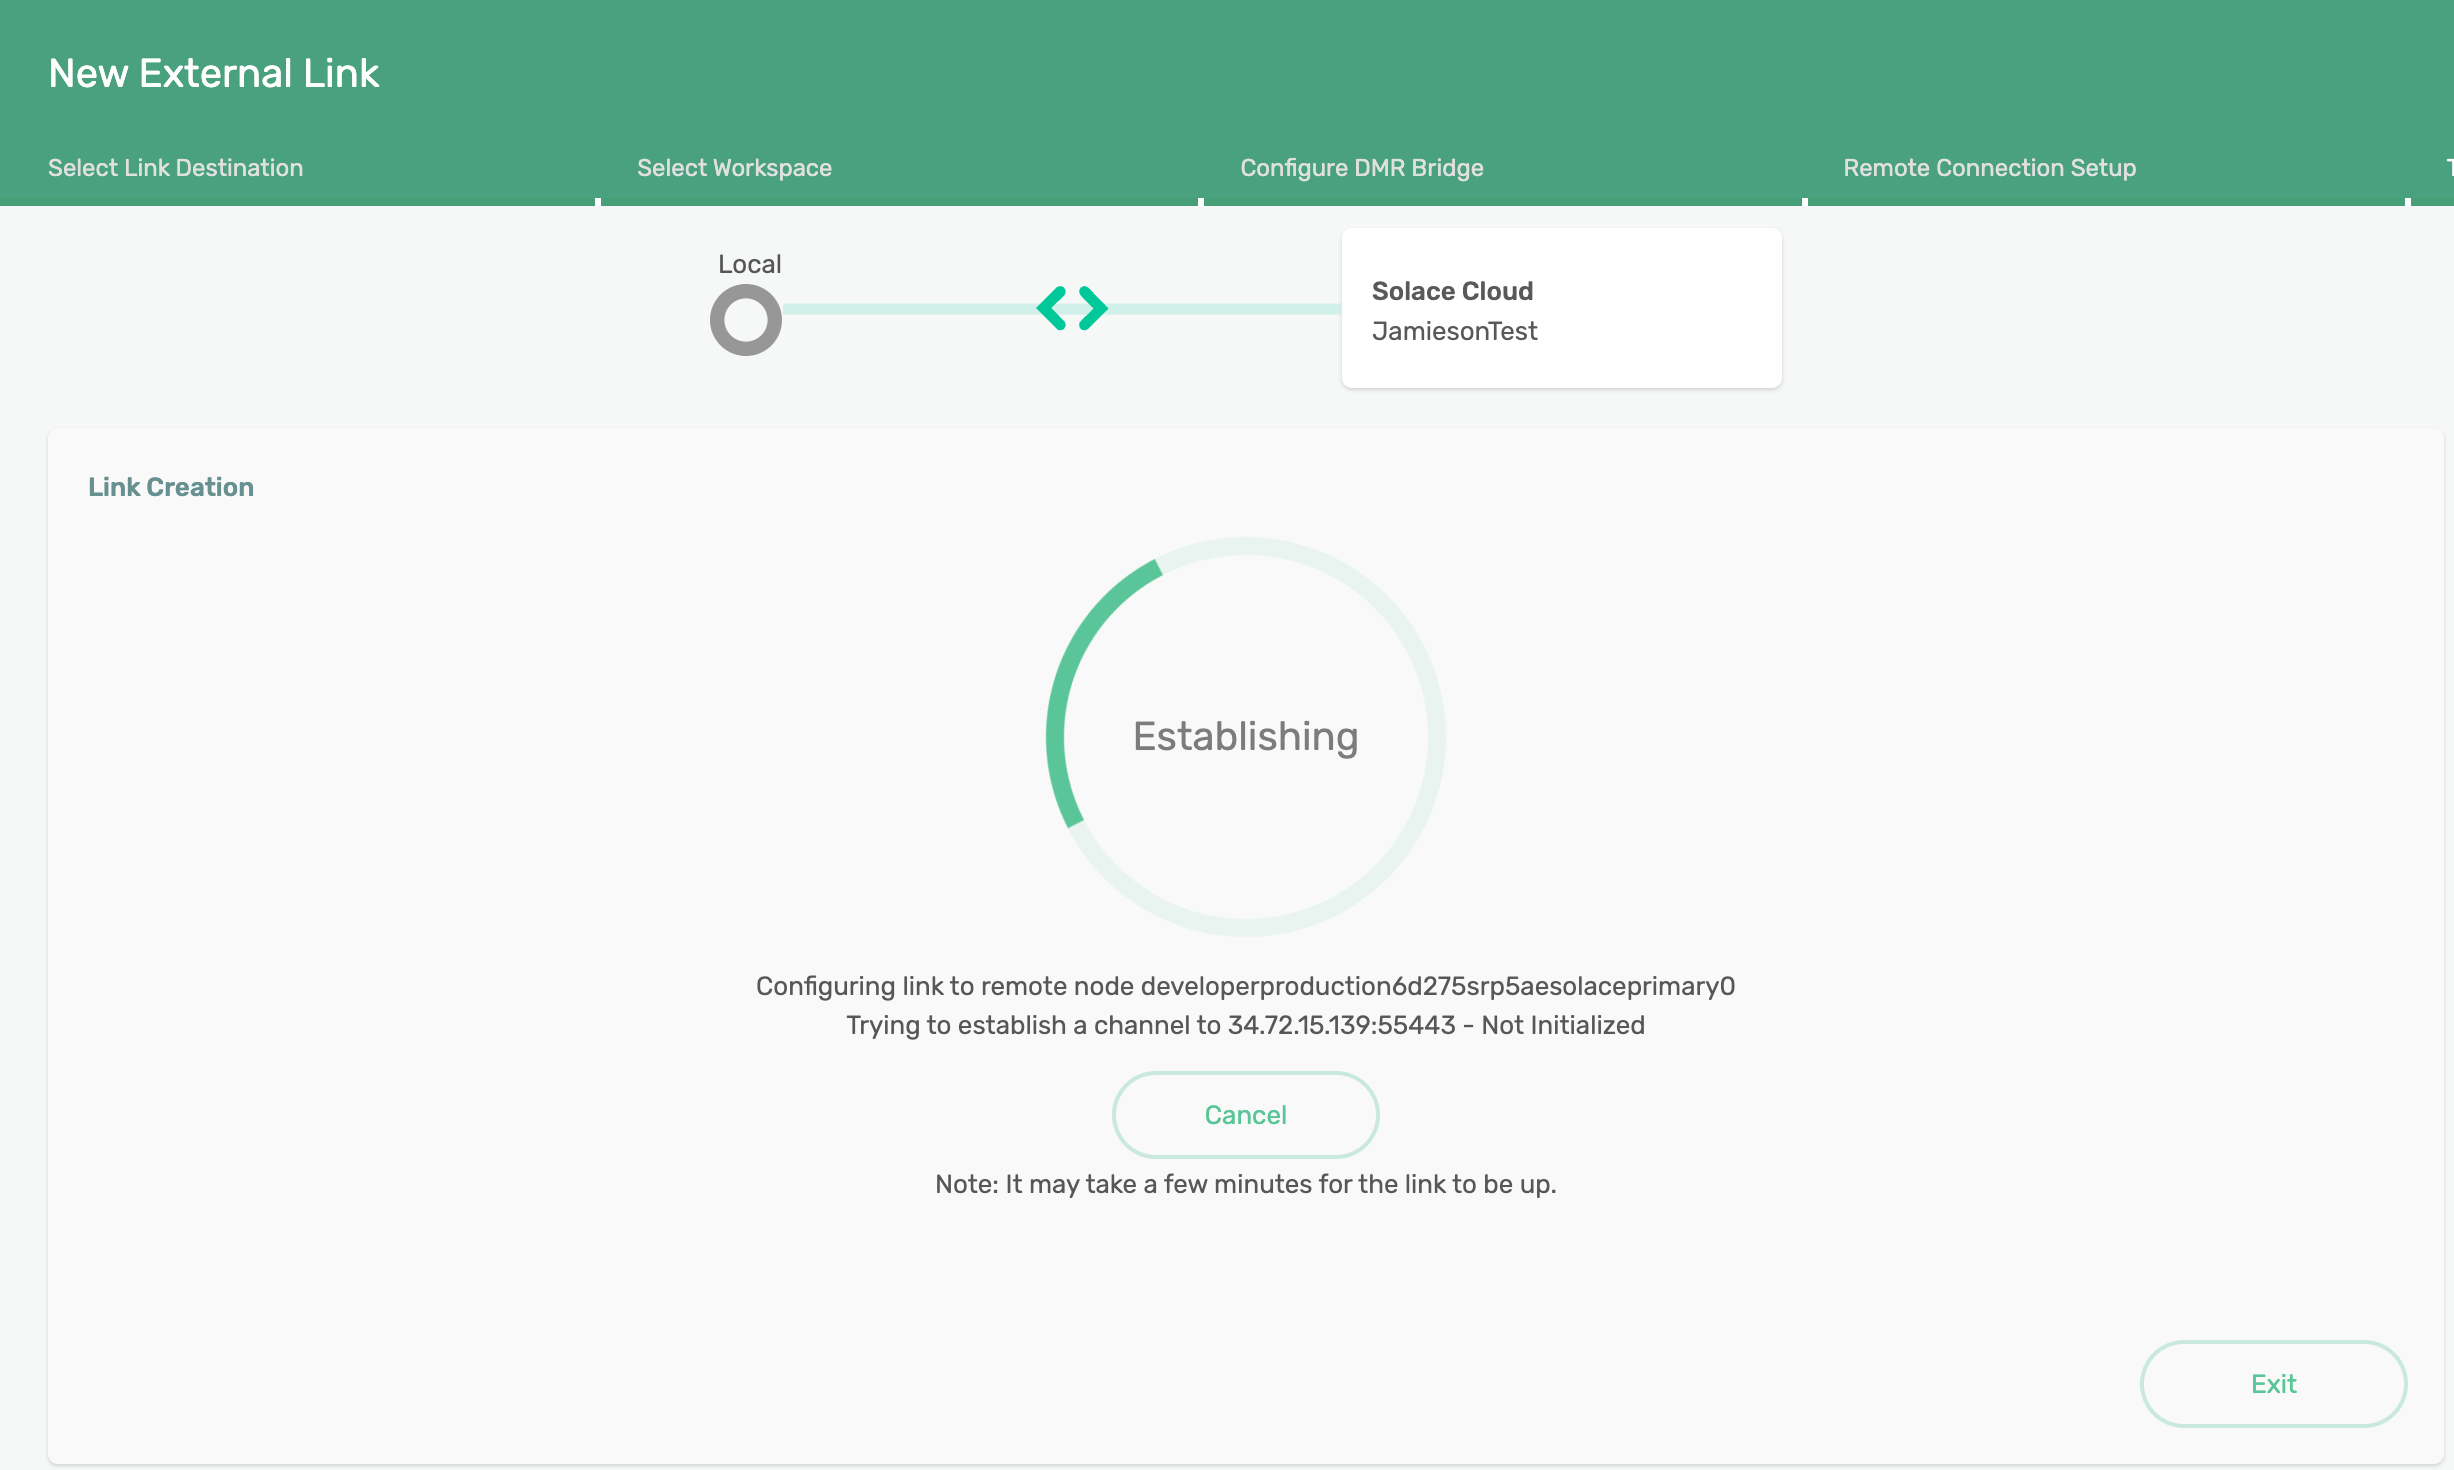
- Wait for Link and Test: The broker will now attempt to establish a link with the specified DMR Link mate. Then once the connection is negotiated the brokers will run bi-directional communication tests.
- Successful DMR Link: After communication tests we will have a successful DMR Link.
If you encounter an error please review a DMR troubleshooting steps to determine how to correct the error and build a successful DMR Link between brokers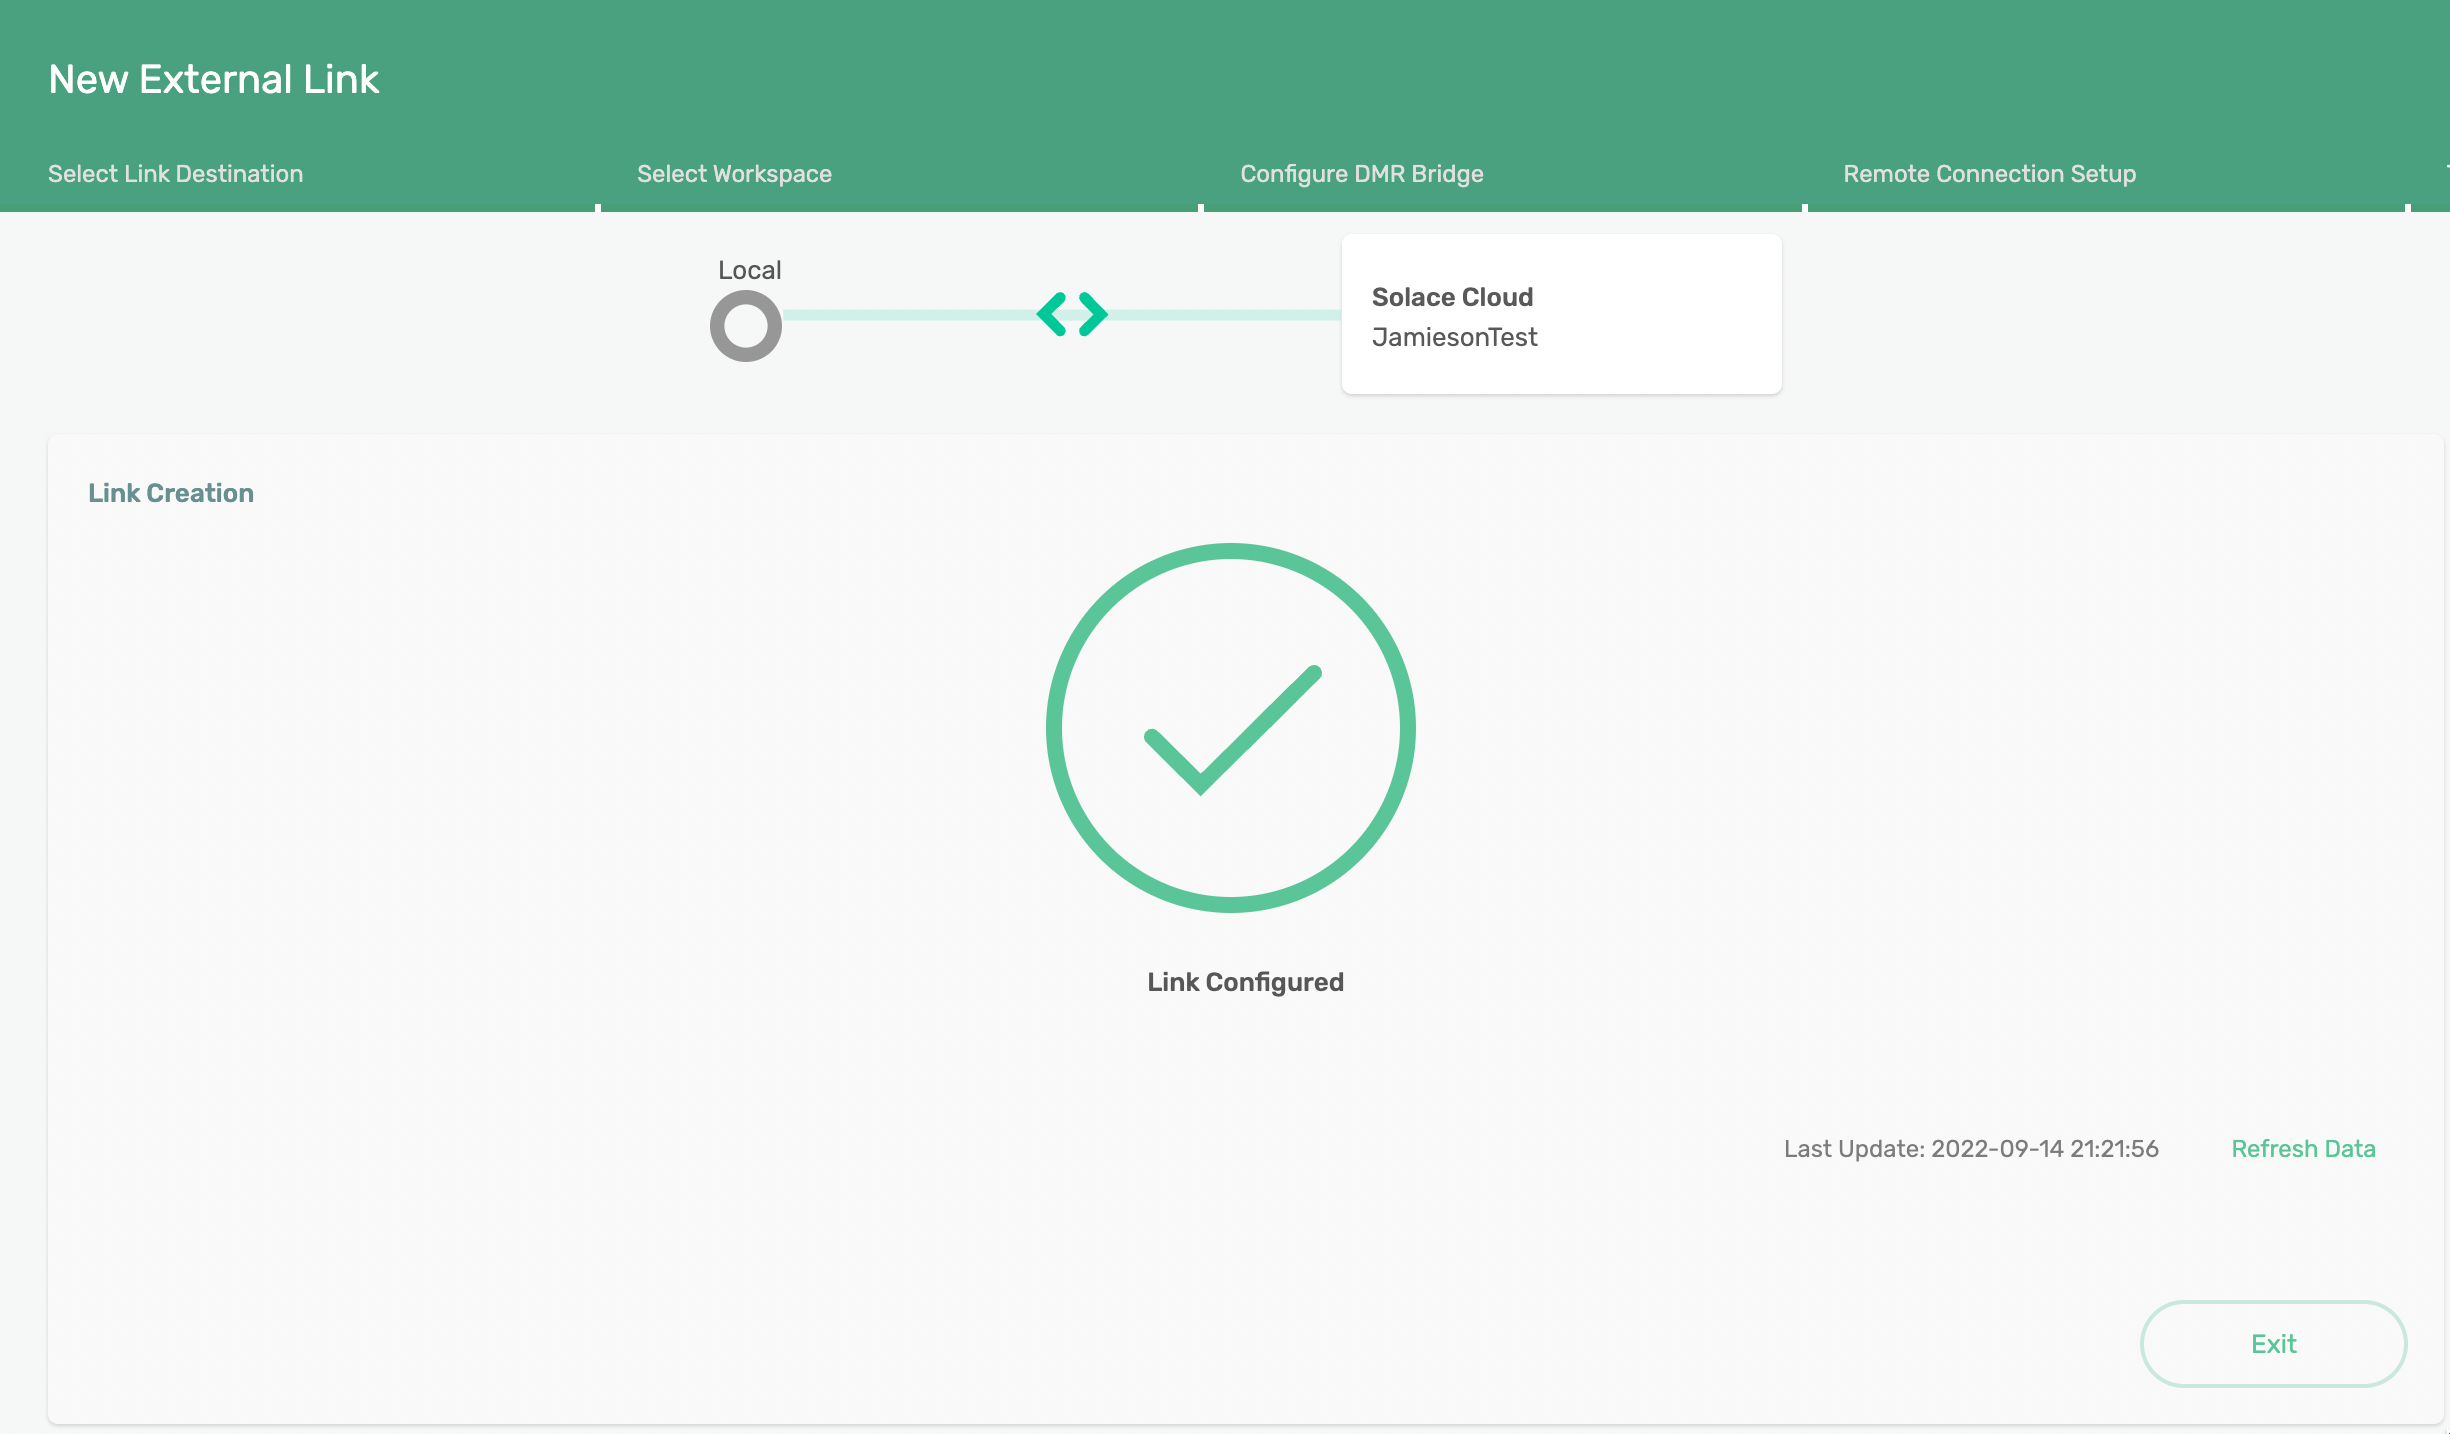
Conclusion
In the previous steps we have provisioned a cluster on each broker to prepare them to participate in an Event Mesh. Then we created a DMR link between the brokers to form the Event Mesh. Events will now be intelligently and Dynamically Routed from the Solace PubSub+ brokers where they are produced to the broker where there are interested subscribers. Continue to learn how we can explore the behavior of events over a DMR Link.
4. Exploration DMR with "Try Me" tab
The Solace Try Me Tab is small CodePen application which was created to provide a simple way of publishing and subscribing to Solace topics and queues. The application produces and consumes WebSocket (WS) events to Solace PubSub+ brokers over a network. Thus is it not required that the Try Me tool be used to connect to a local broker, however the tooling is setup to make connecting to the "local" Solace Broker effortless. Using the Try Me tool you can explore the following Solace features:
- Publish Direct Messages
- Publish Persistent Messages
- Publish to topics
- Publish directly to queues
- Subscribe to Solace topics
- Subscribe to Solace queues
- Subscribe to Solace topics using Solace wild cards
- Experience Solace Broker translate different message protocols (requires the use of Try Me and an additional publisher or subscriber).
In the next section we will explore how using the Try Me tool to Publish and Subscribe only to a single individual Solace Broker will allow us to obtain events from any accessible topic published to any of the Solace Brokers connected to our Solace DMR Event Mesh.
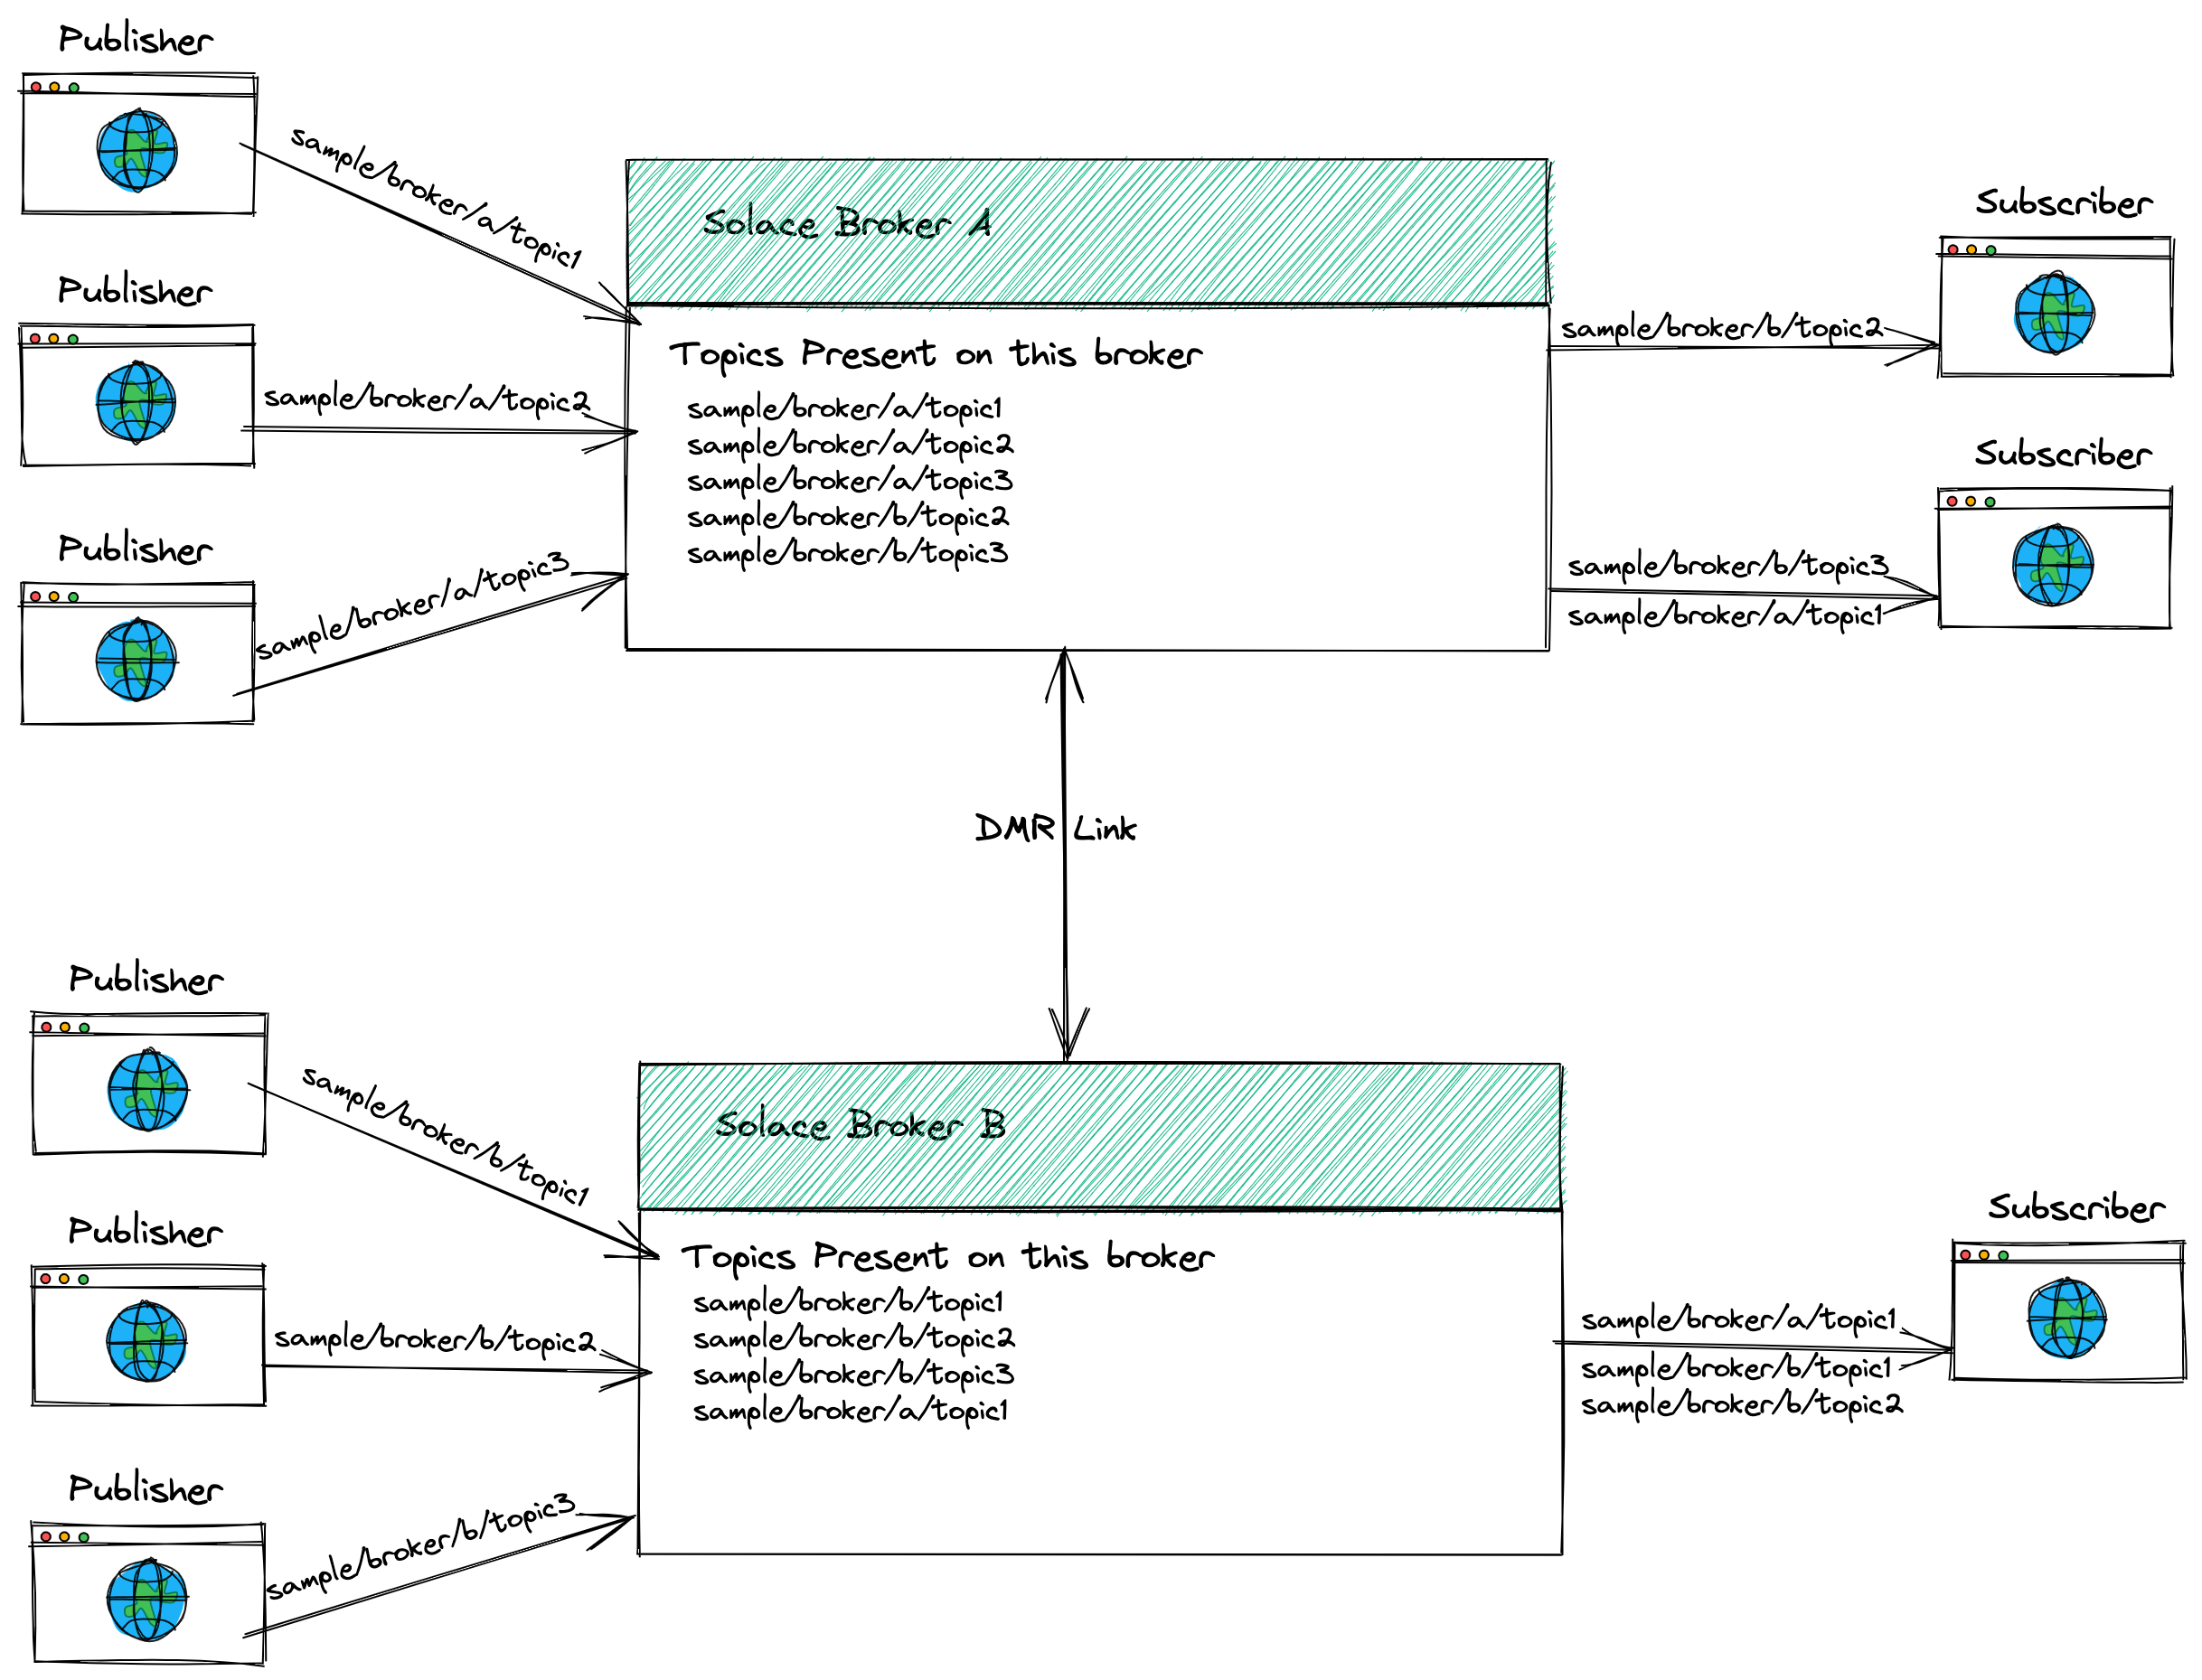
🆘!!!Maybe here I should include some topic architecture for 2 brokers that will allow you to see the DMR Event Mesh in action?
5. Setting up and running "Try Me"
Option A: For your local (on-premise) broker
- Navigate to your on-premise broker WebUI and Login
- Select the Message VPN you wish to use
- Select"Try Me" tab on the left side bar menu inside of the WebUI

- Populate with your on-premise broker details into the Publisher side, unless you are running the broker on your local machine you will likely have to change the "Broker URL", "Client Username" and "Client Password". You may also have to change the "Message VPN" depending on your setup.
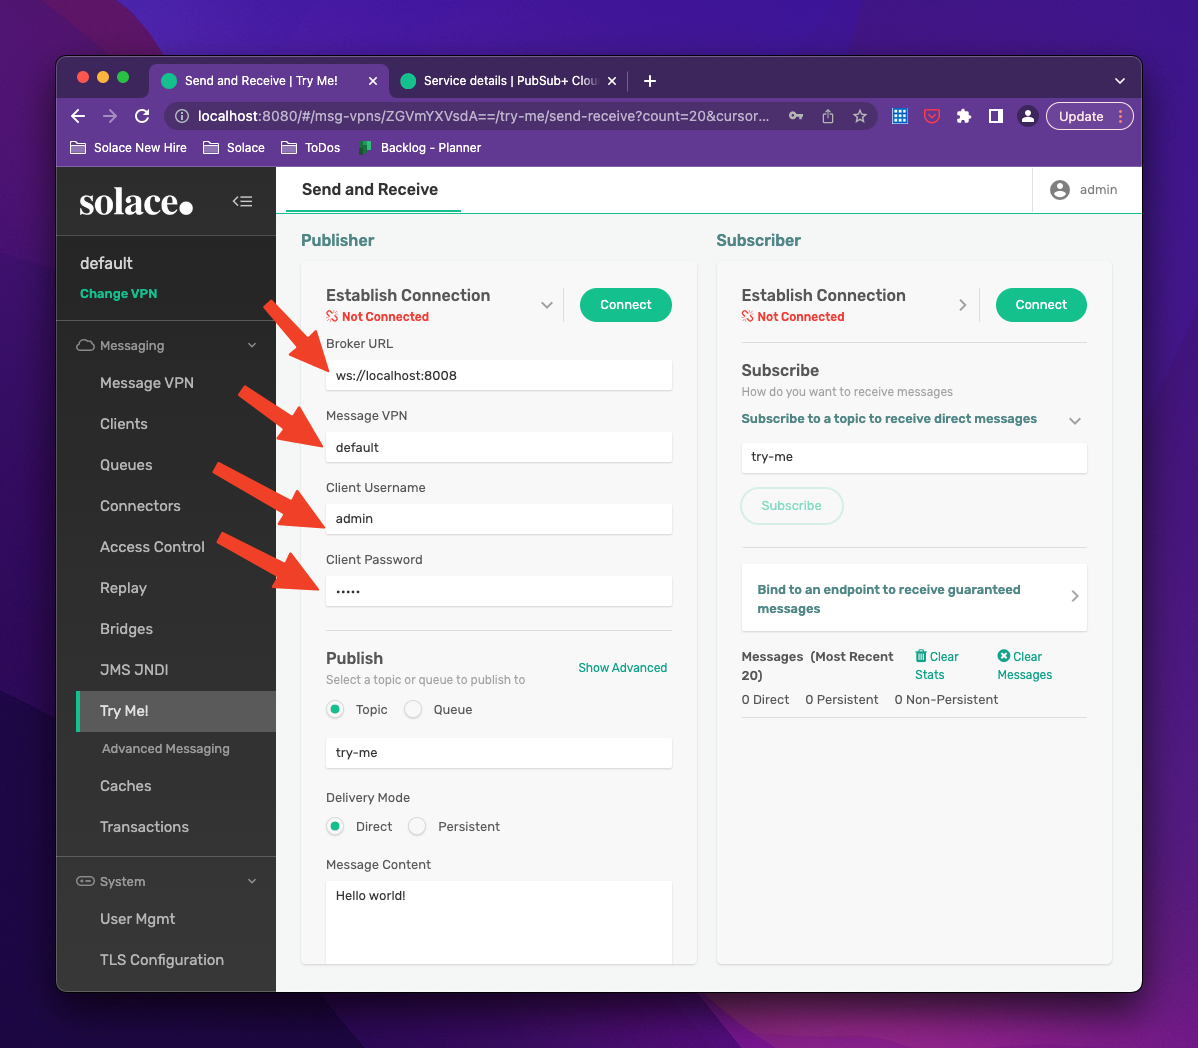
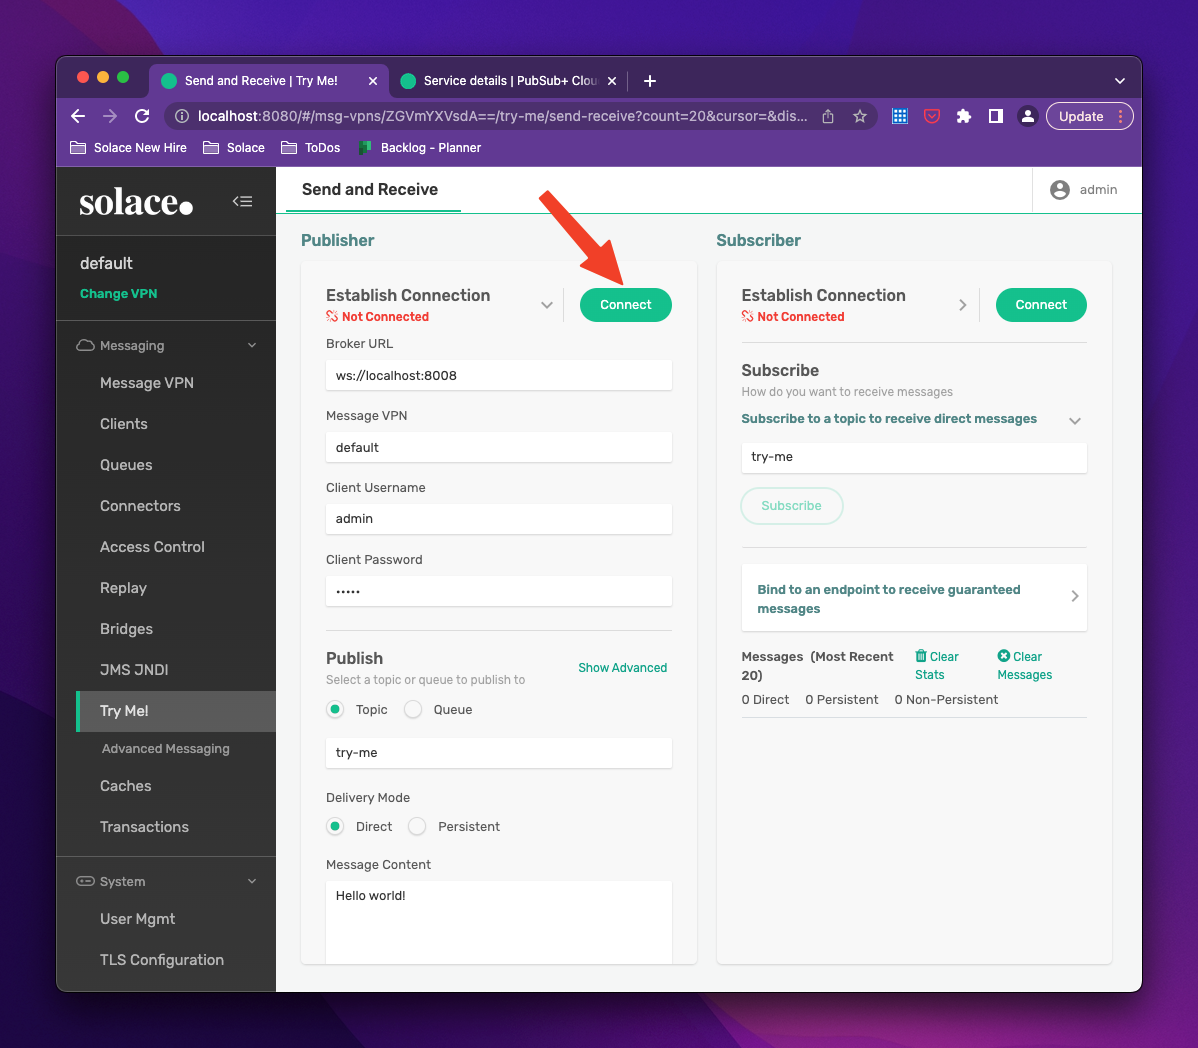
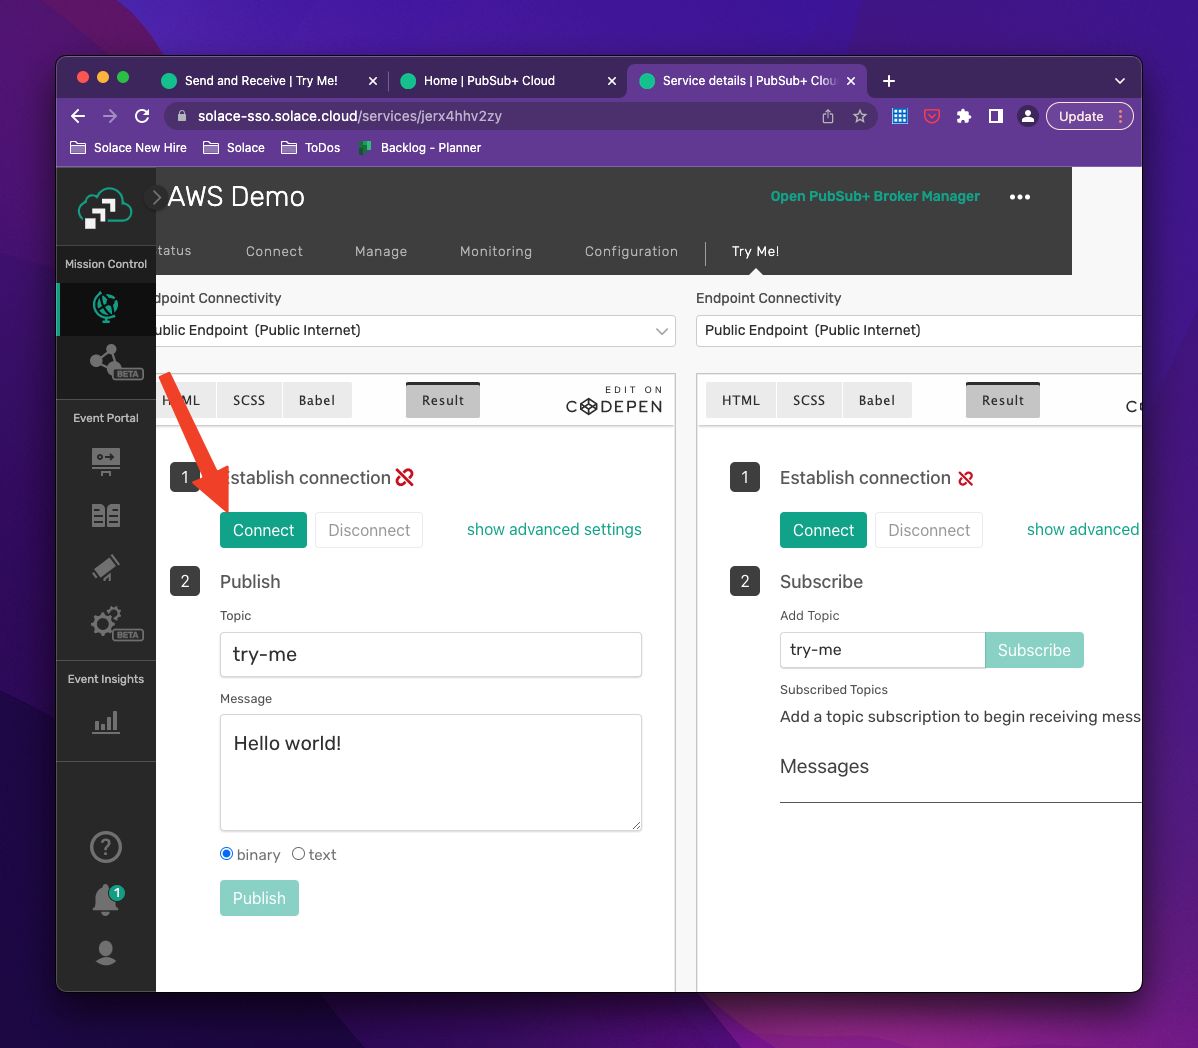
- Select the "Connect" button on the Publisher side of "Try Me".
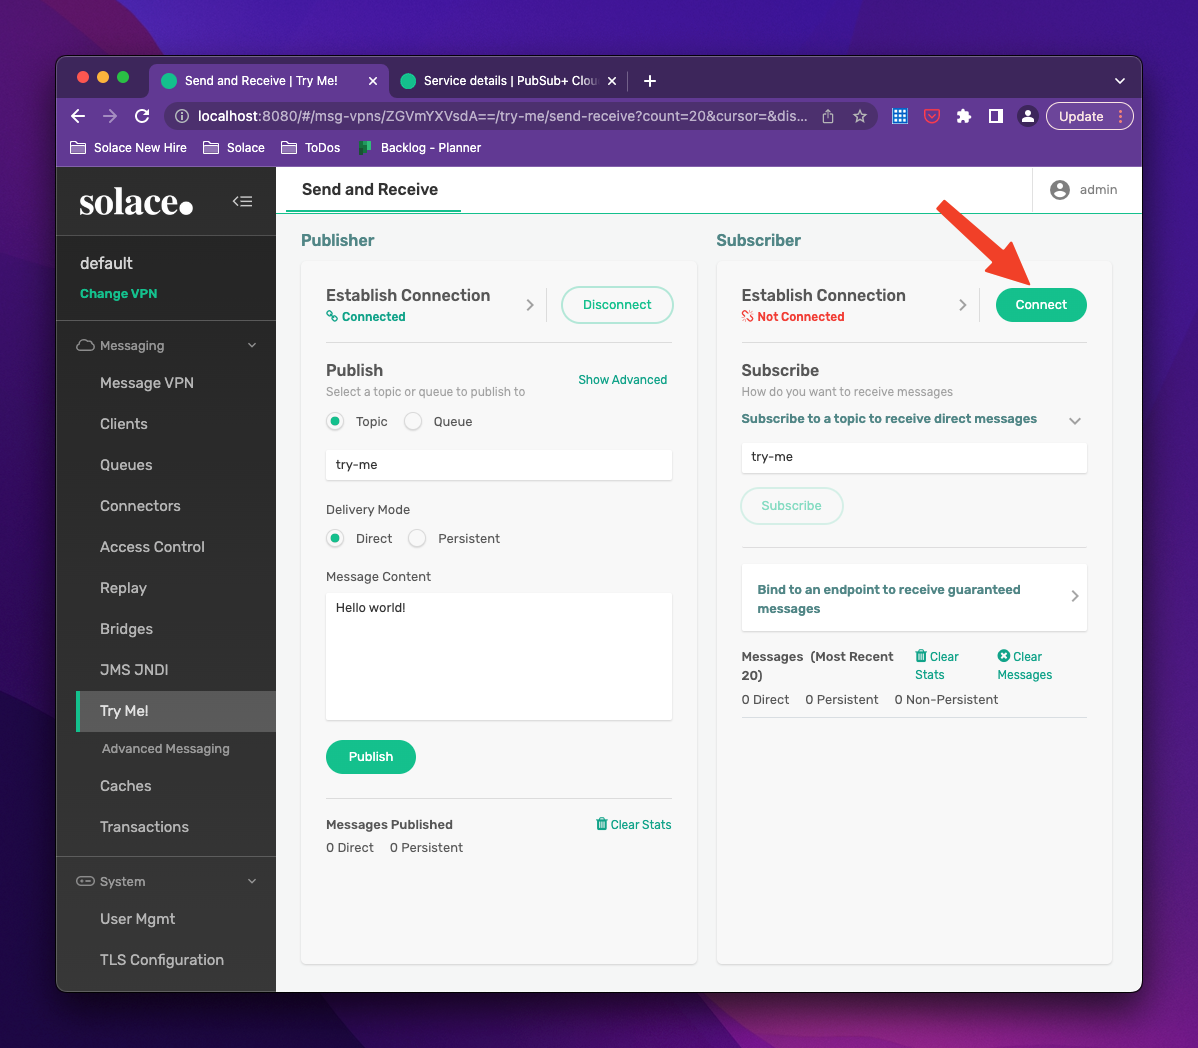
- Select the "Connect" button on the Subscriber side of "Try Me" as well. The connection details will carry over from the Publisher side unless you expand the drop down menu, uncheck the "Same as Publisher" option and modify them.
- Now we can customize our Publish topic, Delivery Mode and Message Content and Publish messages directly to our local (on-premise) broker.

- We can also subscribe to any topics that we would like on the right side by changing the subscribe field and pressing "Subscribe". The topic can be one that is published to our local broker or published to any other broker in the DMR (Event Mesh) that your user has access to. Do not forget about our Solace wild cards here
* is a single level wild card: example/topic/with/a/*/wildcard> is a multi level wild card: example/topic/>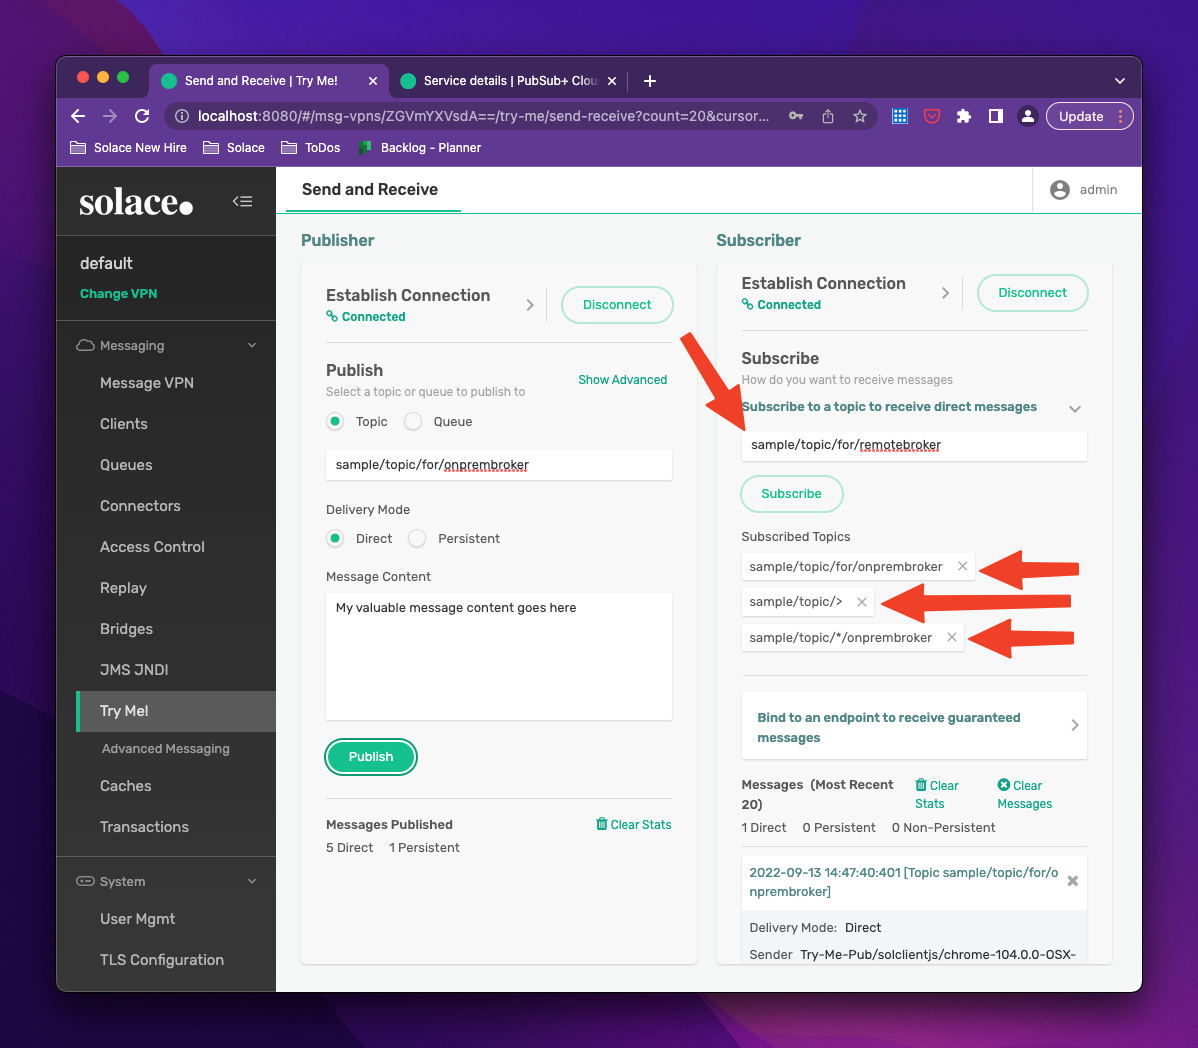
Option B: For your Solace Cloud Brokers
- Log into Solace Cloud
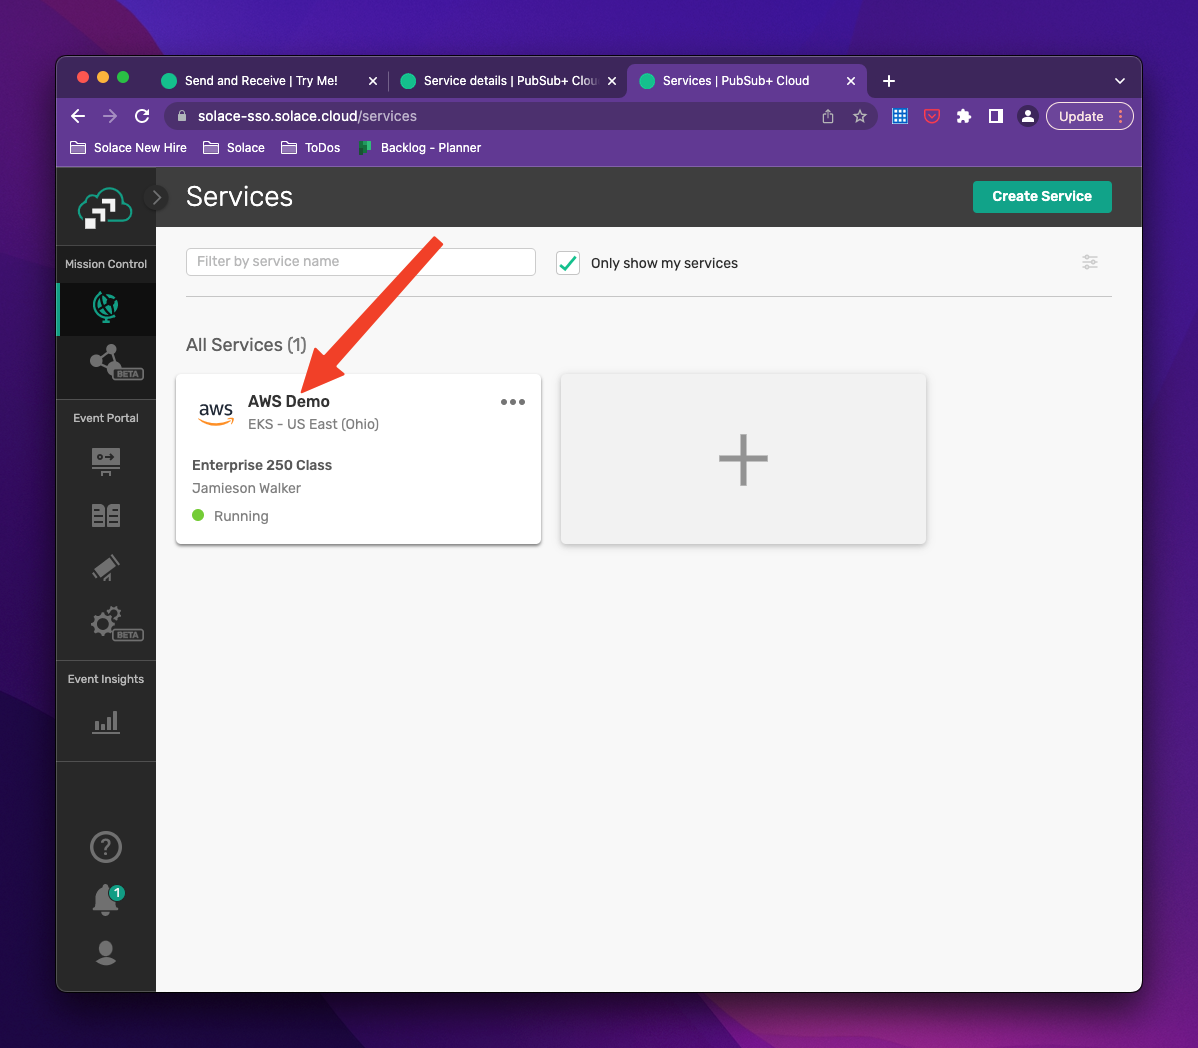
- Select the Service you would like to test. Remember that the service must already be DMR linked to the other services you want to experiment with.
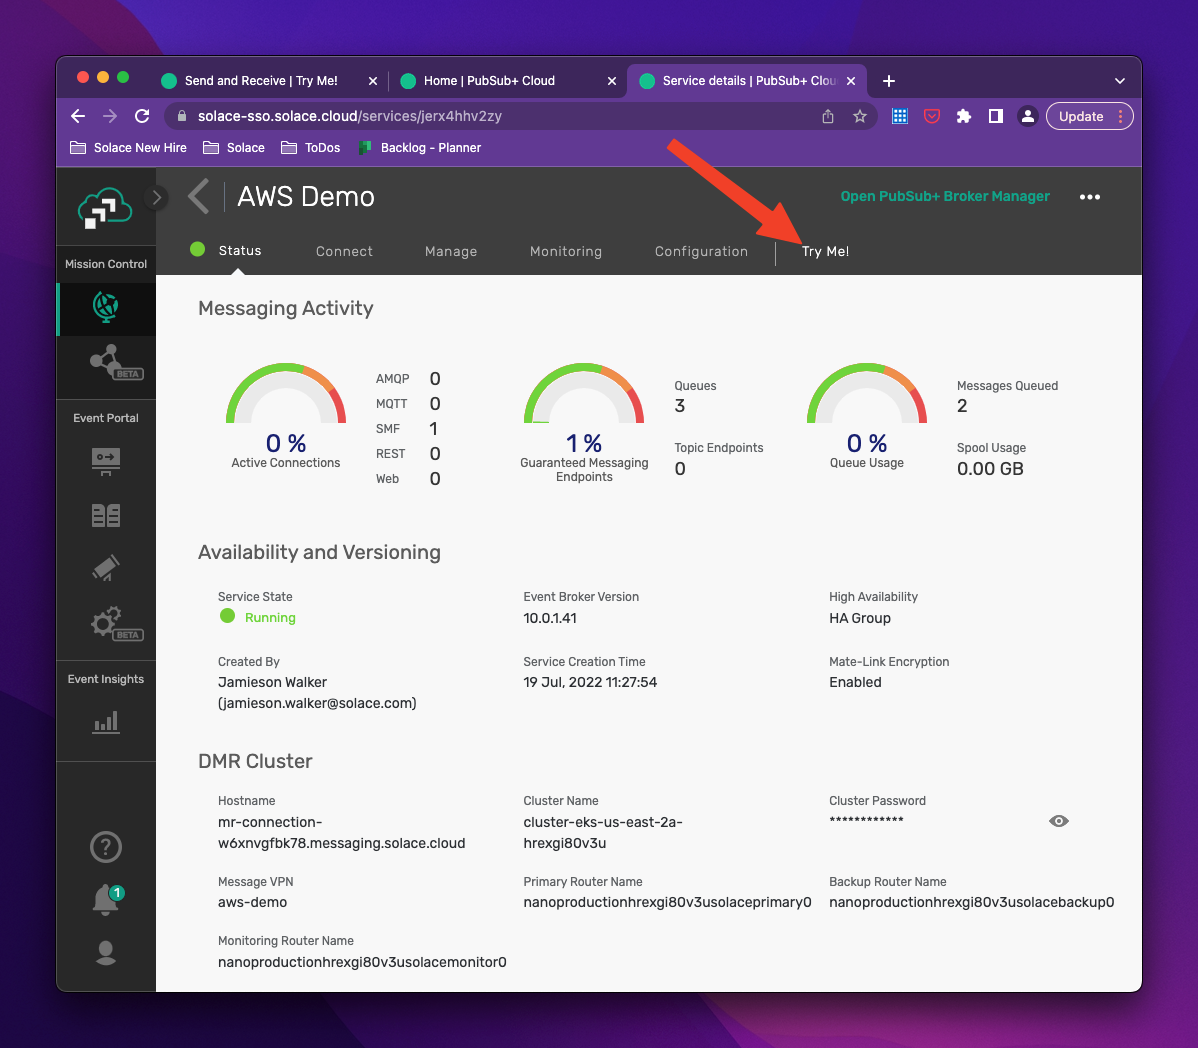
- Navigate to the "Try Me!" Tab along the top of the services web page
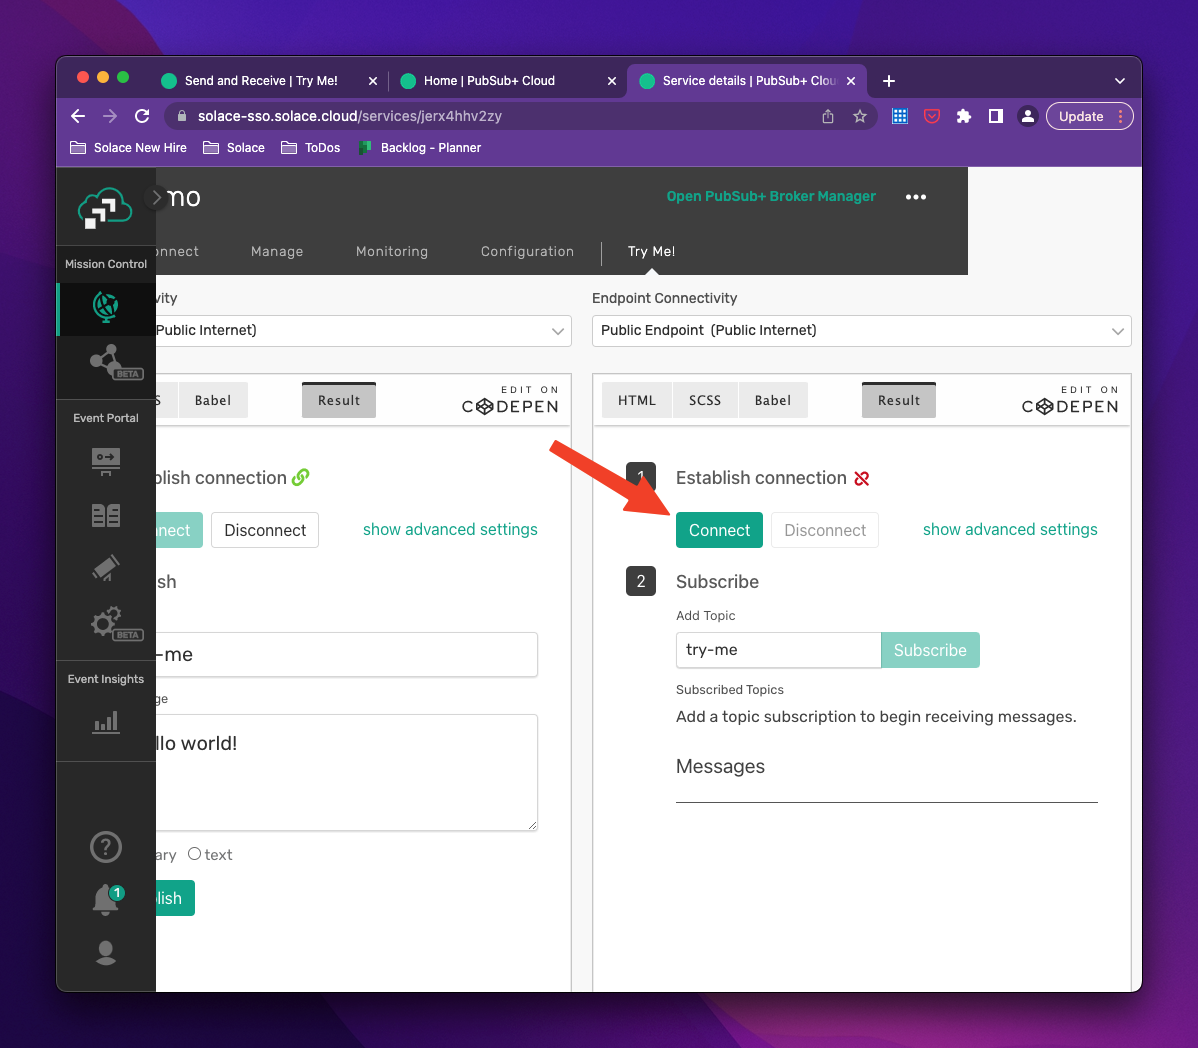
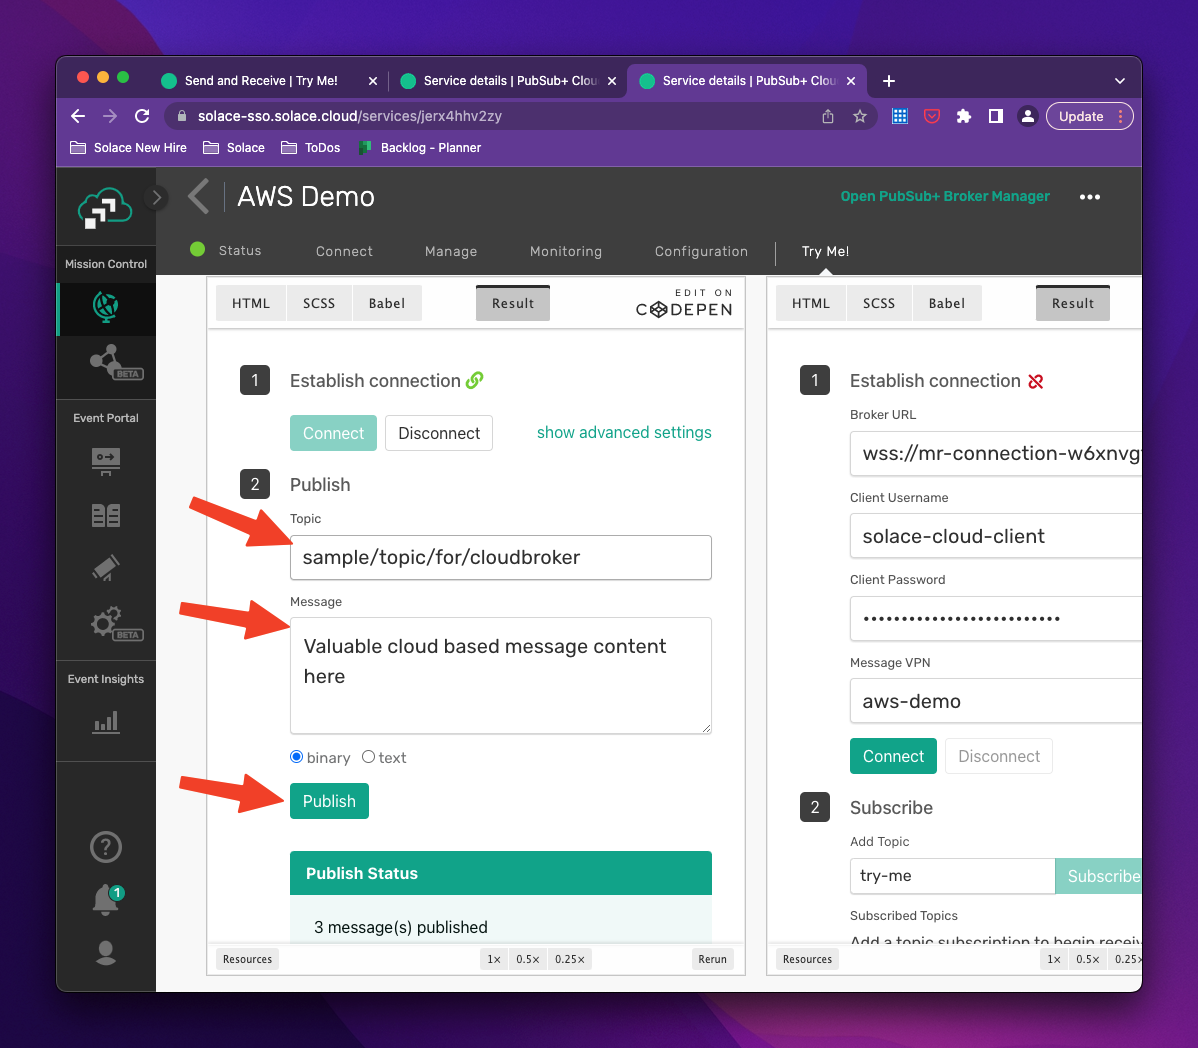
- On Solace Cloud the Service connection details should already be correctly populated and you can simply click "Connect" on the Publisher side. However if that does not work you can select "show advanced settings" to manually configure "Broker URL" "Client Username" "Client Password" and "Message VPN"
- On the Subscriber side you can also simply select "Connect". However if that does not work you can select "show advanced settings" to manually configure "Broker URL" "Client Username" "Client Password" and "Message VPN"
- Now we will specify a unique publish topic on the Publisher side of the "Try Me!" tab and begin publishing events to our cloud broker
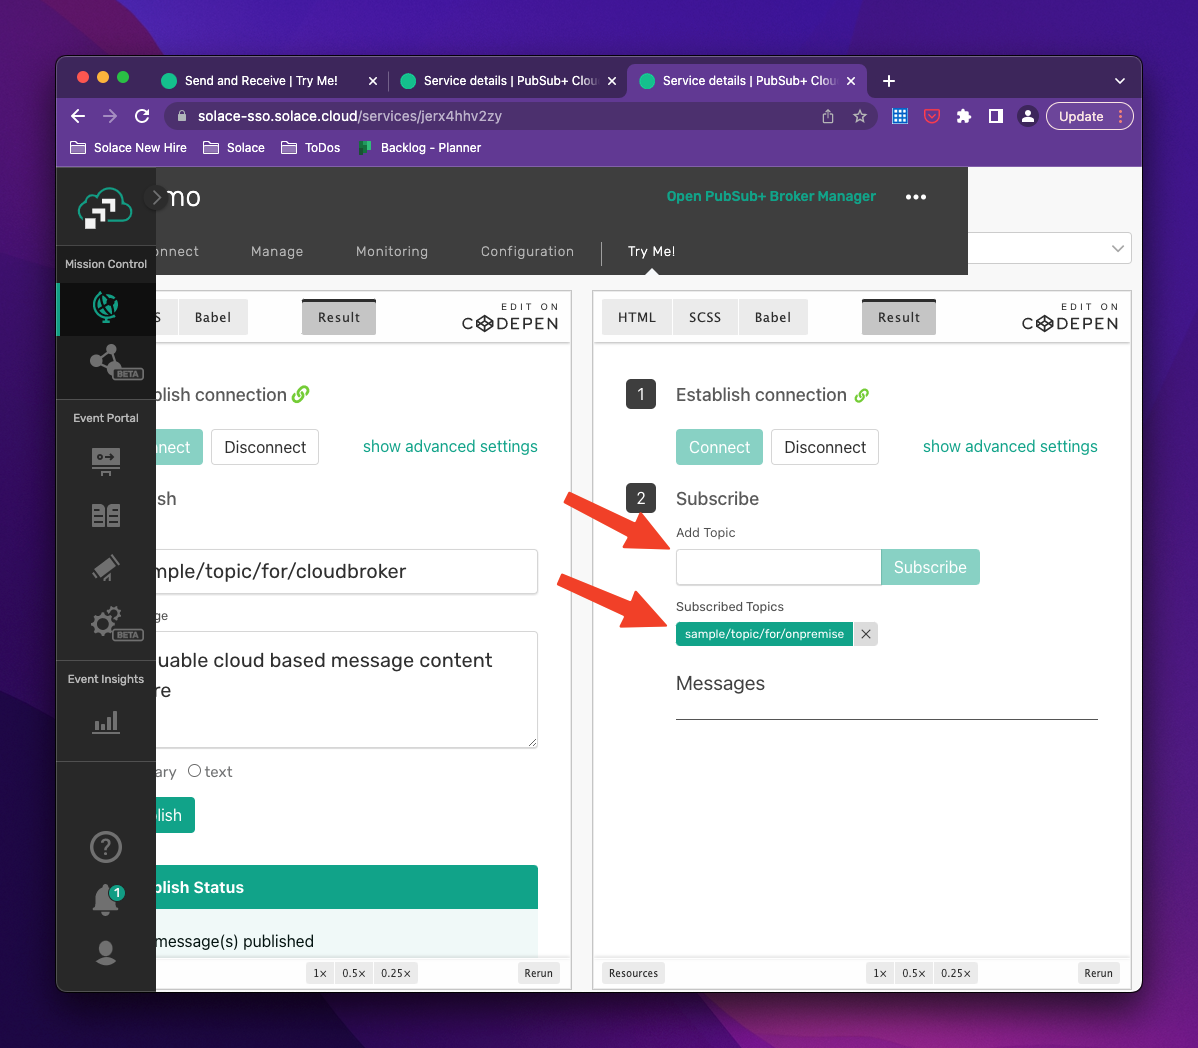
- We can also subscribe to any topics that we would like on the right side by changing the subscribe field and pressing "Subscribe". The topic can be one that is published to our local broker or published to any other broker in the DMR(Event Mesh) that your user has access to. Do not forget about our Solace wild cards here:
* is a single level wild card: sample/topic/with/a/*/wildcard> is a multi level wild card: sample/topic/>
Seeing Events flow across the DMR (Event Mesh):
Now that we have created publishers and subscribers via the "Try Me" tabs on our different DMR linked (Event Mesh) brokers we can start publishing events and watch them flow between brokers. Experiment with "Try Me" subscriptions to only local topics, remote topics and combinations of both to get a better understanding of how Solace is Dynamically Routing messages between brokers.
6. Exploration DMR with SDKPerf tool
Obtain the SDKPerf Solace Performance testing tool from our downloads page here: https://solace.com/downloads/ at the bottom of the page. You can select from your desired flavor or the testing tool.

Check out general SDKPerf documentation here: https://docs.solace.com/API/SDKPerf/SDKPerf.htm
And additional command line argument options here: https://docs.solace.com/API/SDKPerf/Command-Line-Options.htm
7. Running SDKPerf
Navigate to the unpacked directory of your recently downloaded SDKPerf tool in the terminal of your choice. When you list the contents of the directory you should see some libraries and in the case of the java tool: sdkperf_java.sh and sdkperf_java.bat. We will use these scripts to execute the tool.
List of common SDKPerf flags
-cip= <- the ip address(host name) and port of the broker we wish to connect to
-cu=  <- userid and message vpn we wish to connect as seperated by @
-cp=  <- password for the user we are connecting as
-ptl= <- publish topic list, the topics we want to publish to separeated by ,
-stl= <- list of topics we want to subscribe to separated by a ,
-mn=  <- integer for the number of messages we want to publish
-mr=  <- integer for the rate at which we want to publish or subscribe in msg/sec
Create SDKPerf Publisher to Broker A on topic sample/broker/a
./sdkperf_java.sh -cip=localhost:55554 -cu=admin@default -cp=admin -ptl=sample/broker/a -mn=100 -mr=1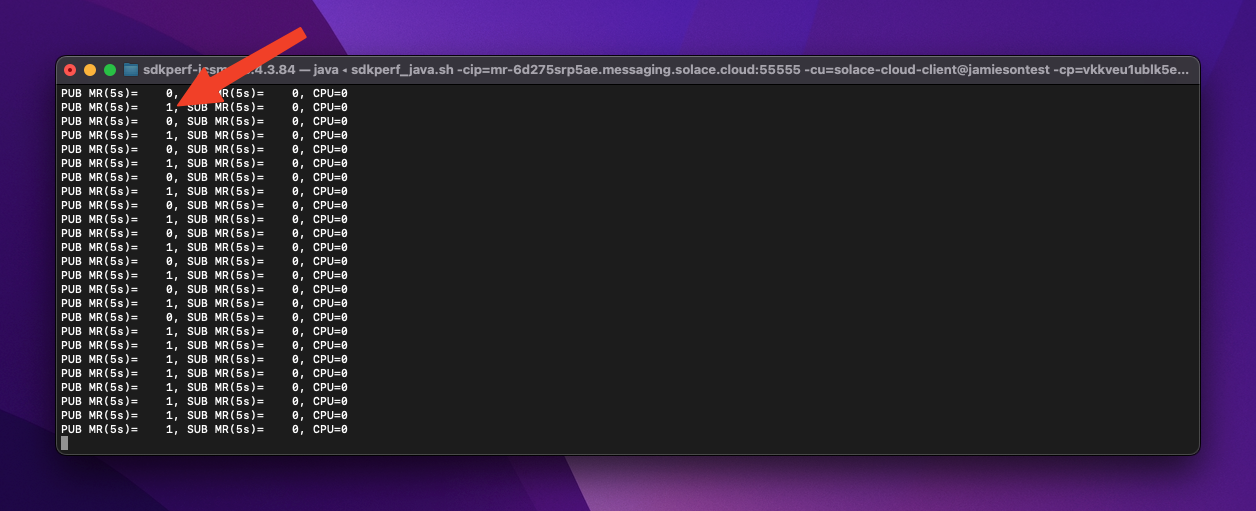
Create SDKPerf Publisher to Broker B on topic sample/broker/b
./sdkperf_java.sh -cip=mr-6d275srp5ae.messaging.solace.cloud:55555 -cu=solace-cloud-client@jamiesontest -cp=vkkveu1ublk5ekl4mffh7uvmf -ptl=sample/broker/b -mn=100 -mr=1
Create SDKPerf Subscriber to Broker A on topic sample/broker/b
./sdkperf_java.sh -cip=localhost:55554 -cu=admin@default -cp=admin -stl=sample/broker/b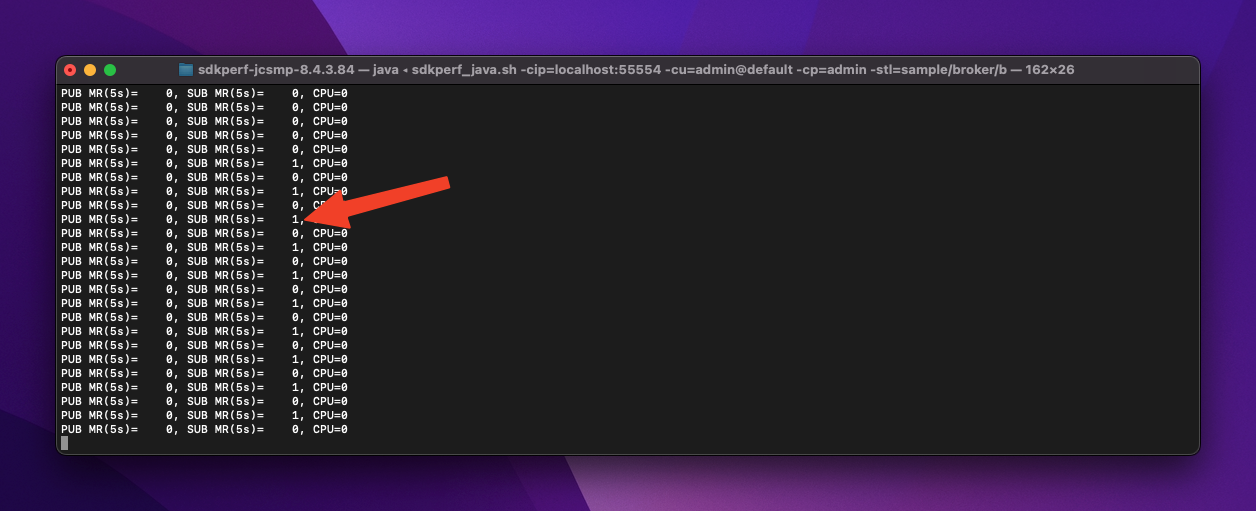
Create SDKPerf Subscriber to Broker B on topic sample/broker/a
./sdkperf_java.sh -cip=mr-6d275srp5ae.messaging.solace.cloud:55555 -cu=solace-cloud-client@jamiesontest -cp=vkkveu1ublk5ekl4mffh7uvmf -stl=sample/broker/a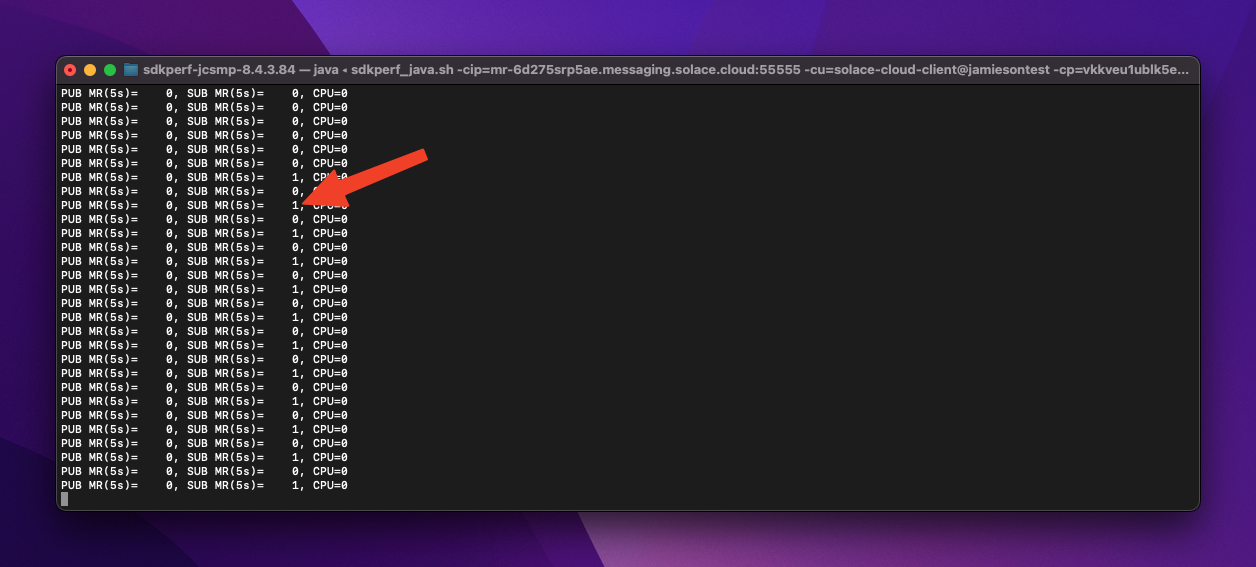
8. Conclusion
✅ Setup a DMR link between two Solace Brokers
✅ Publish and Subscribe to DMR enabled topics with Try Me
✅ Publish and Subscribe to DMR enabled topics with SDKPerf
We prepared Solace PubSub+ Event Brokers to participate in an Event Mesh by provisioning a cluster on each broker. Then we connected those brokers together with DMR Links to create an Event Mesh. After creating our Event Mesh we explored two different ways of easily publishing and subscribing to Solace topics. Using these two methods and Solace Brokers that are connected into a DMR Event Mesh you can create a suite of publishers and subscribers on each broker in the Event Mesh. By experimenting with the topics each subscriber SDKPerf tool or "Try Me" tool is advertising a subscription to you can see how events are dynamically routed between brokers that are DMR linked.
As a final note you can also cause a broker in the DMR Event Mesh to have advertise a topic subscription by creating a queue on the broker and subscribing to a topic that is being published to a different broker in the DMR Event Mesh. But keep in mind that the subscriptions in these queues will be a more static subscription so unless you delete the queue or its subscription the events will always be passed to that broker to be stored on the queue.

Thanks for participating in this codelab! Let us know what you thought in the Solace Community Forum! If you found any issues along the way we'd appreciate it if you'd raise them by clicking the Report a mistake button at the bottom left of this codelab.